


Introduction
This setting establishes maximum and minimum limit values within which your device can operate in other modes. Unlike other settings, the maximum and minimum values are set in ON mode and OFF mode, respectively. Once defined, they automatically apply in all other modes. Reminder: levels can be set from 0 to 10, where level 0 turns the device off and level 10 activates full power. This lets you regulate fan speed or adjust the brightness of grow lights. This setting affects AUTO mode, TIMER TO ON mode, TIMER TO OFF mode, Cycle mode, and Schedule mode. This feature is only available on UIS™ controllers.
Maximum Value Setting (ON Mode)
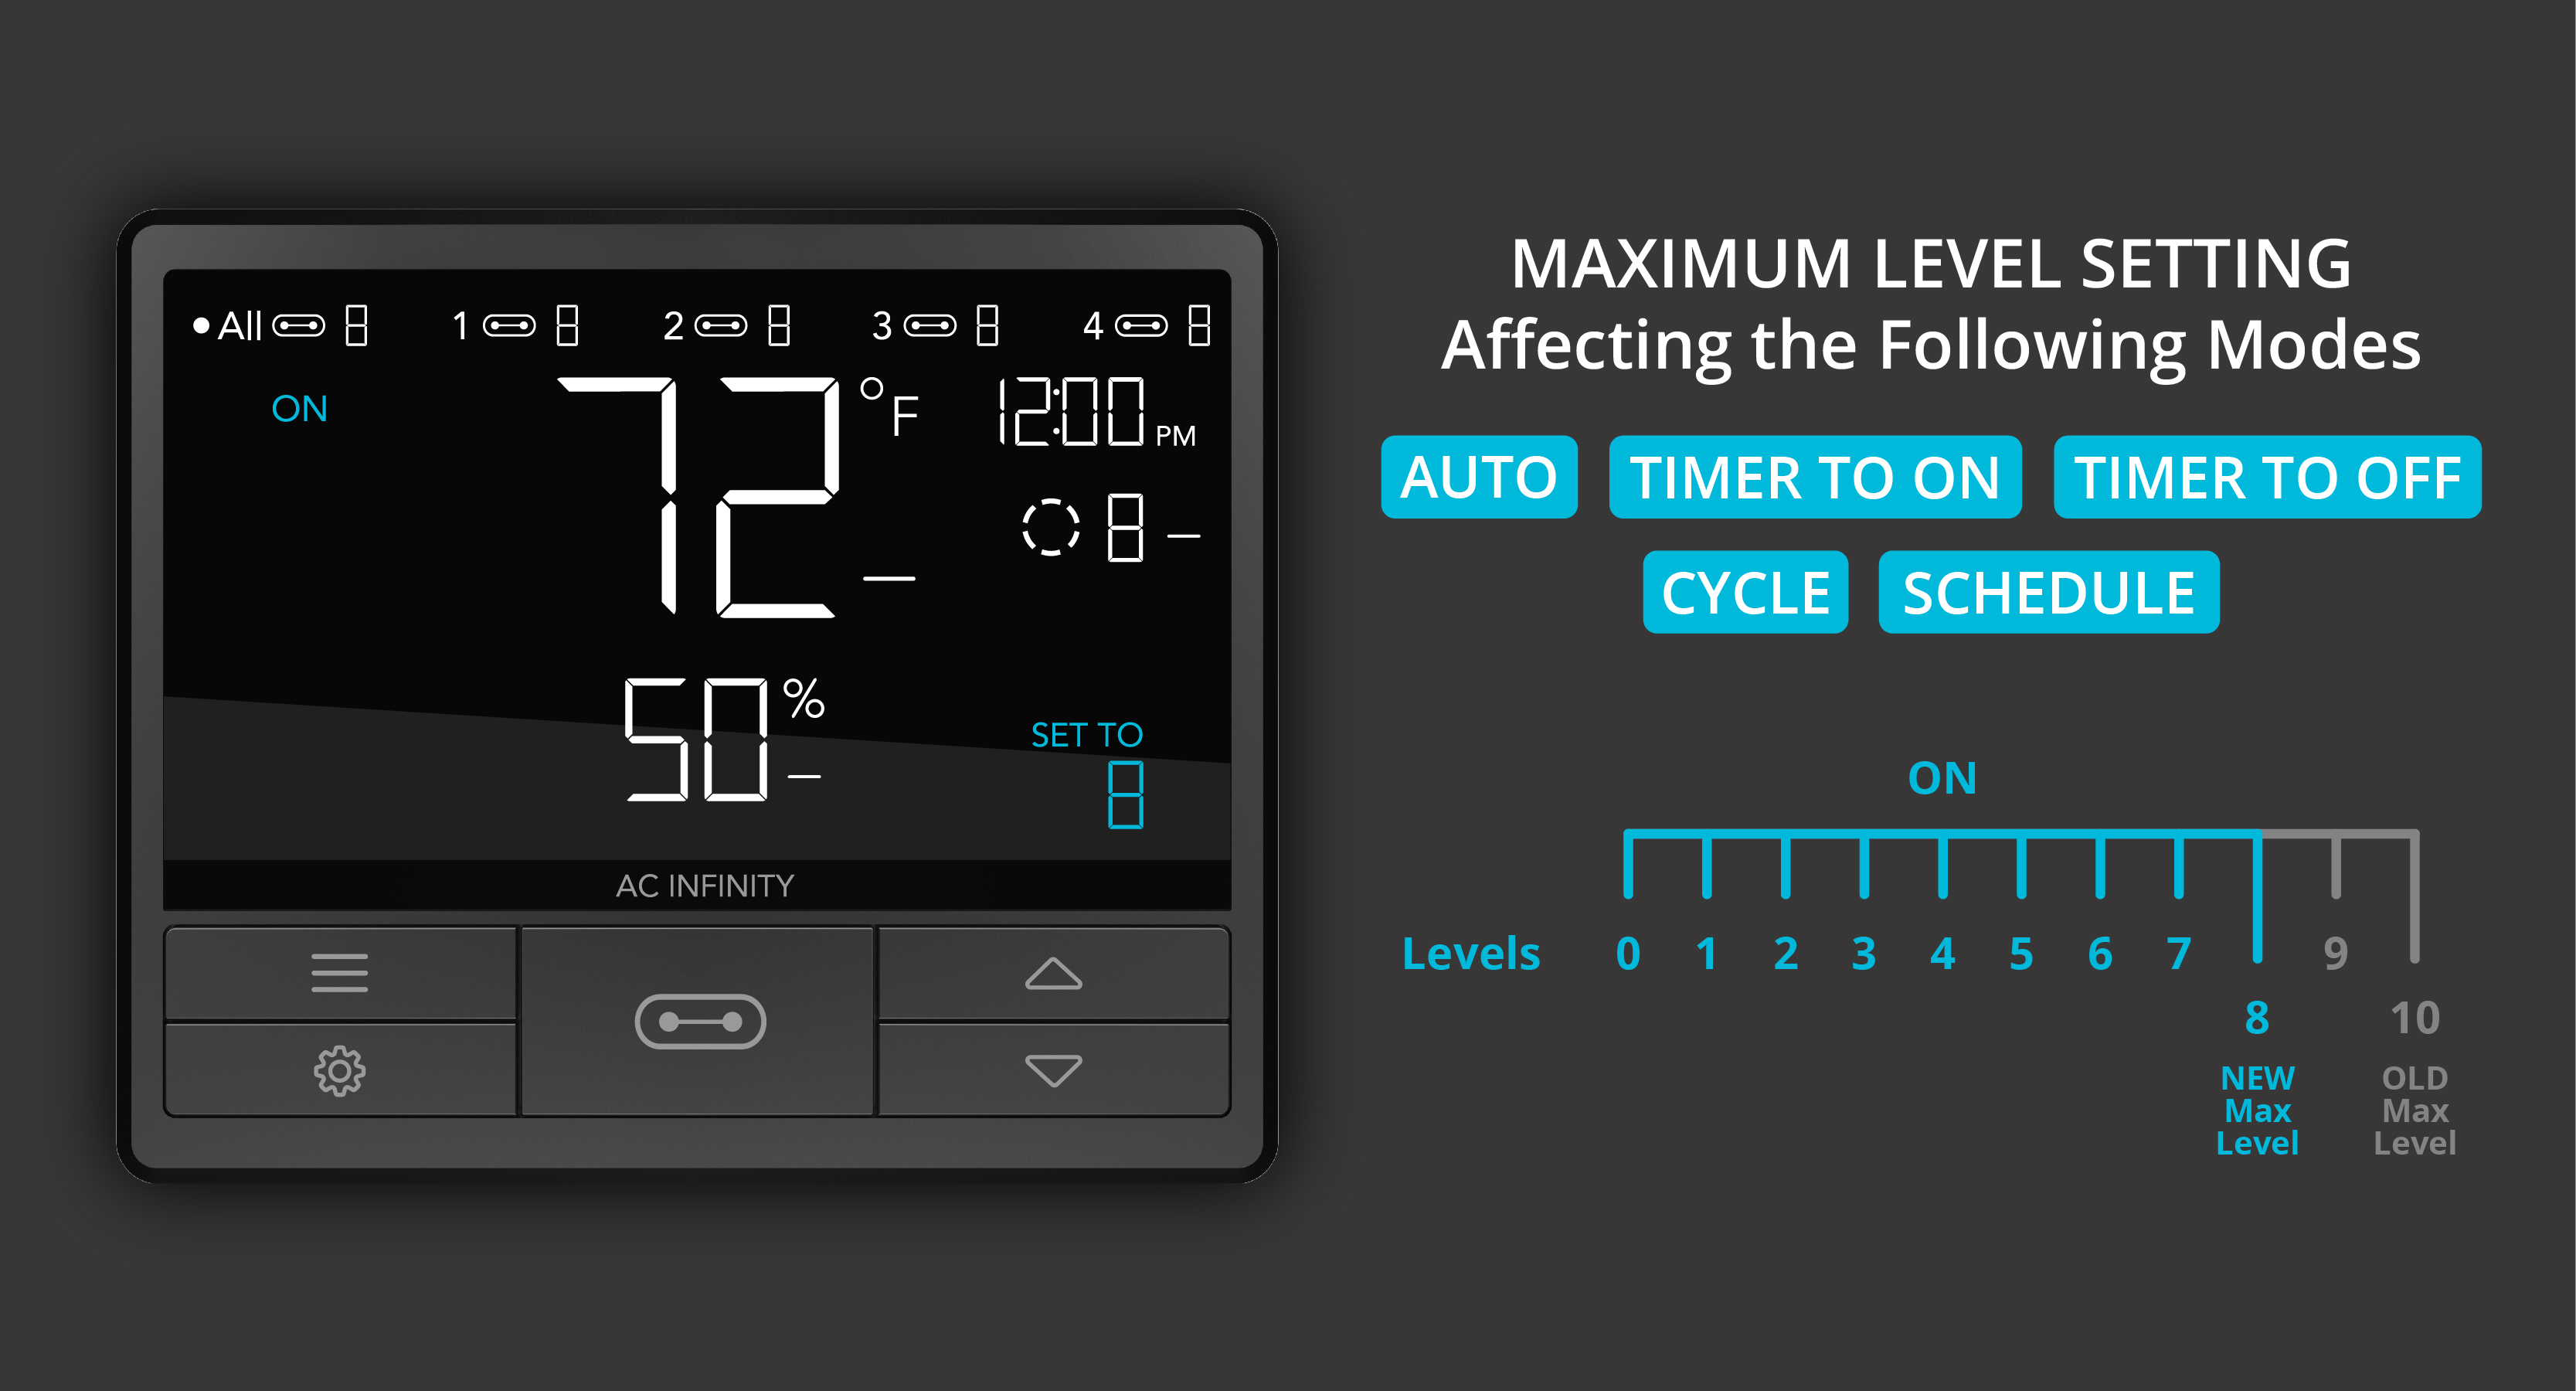
The number you set in ON mode is the maximum value your device can reach in all other modes. Example: you set level 8 in ON mode, then switch to AUTO mode, where your device is triggered by temperature or humidity. In this case, your device will always run at level 8 when it turns on. If a Transition setting is active, your device will gradually increase its level until it reaches level 8. Don't set the maximum value to 0, or your device would remain off when it's meant to be activated in other modes.
Minimum Value Setting (OFF Mode)
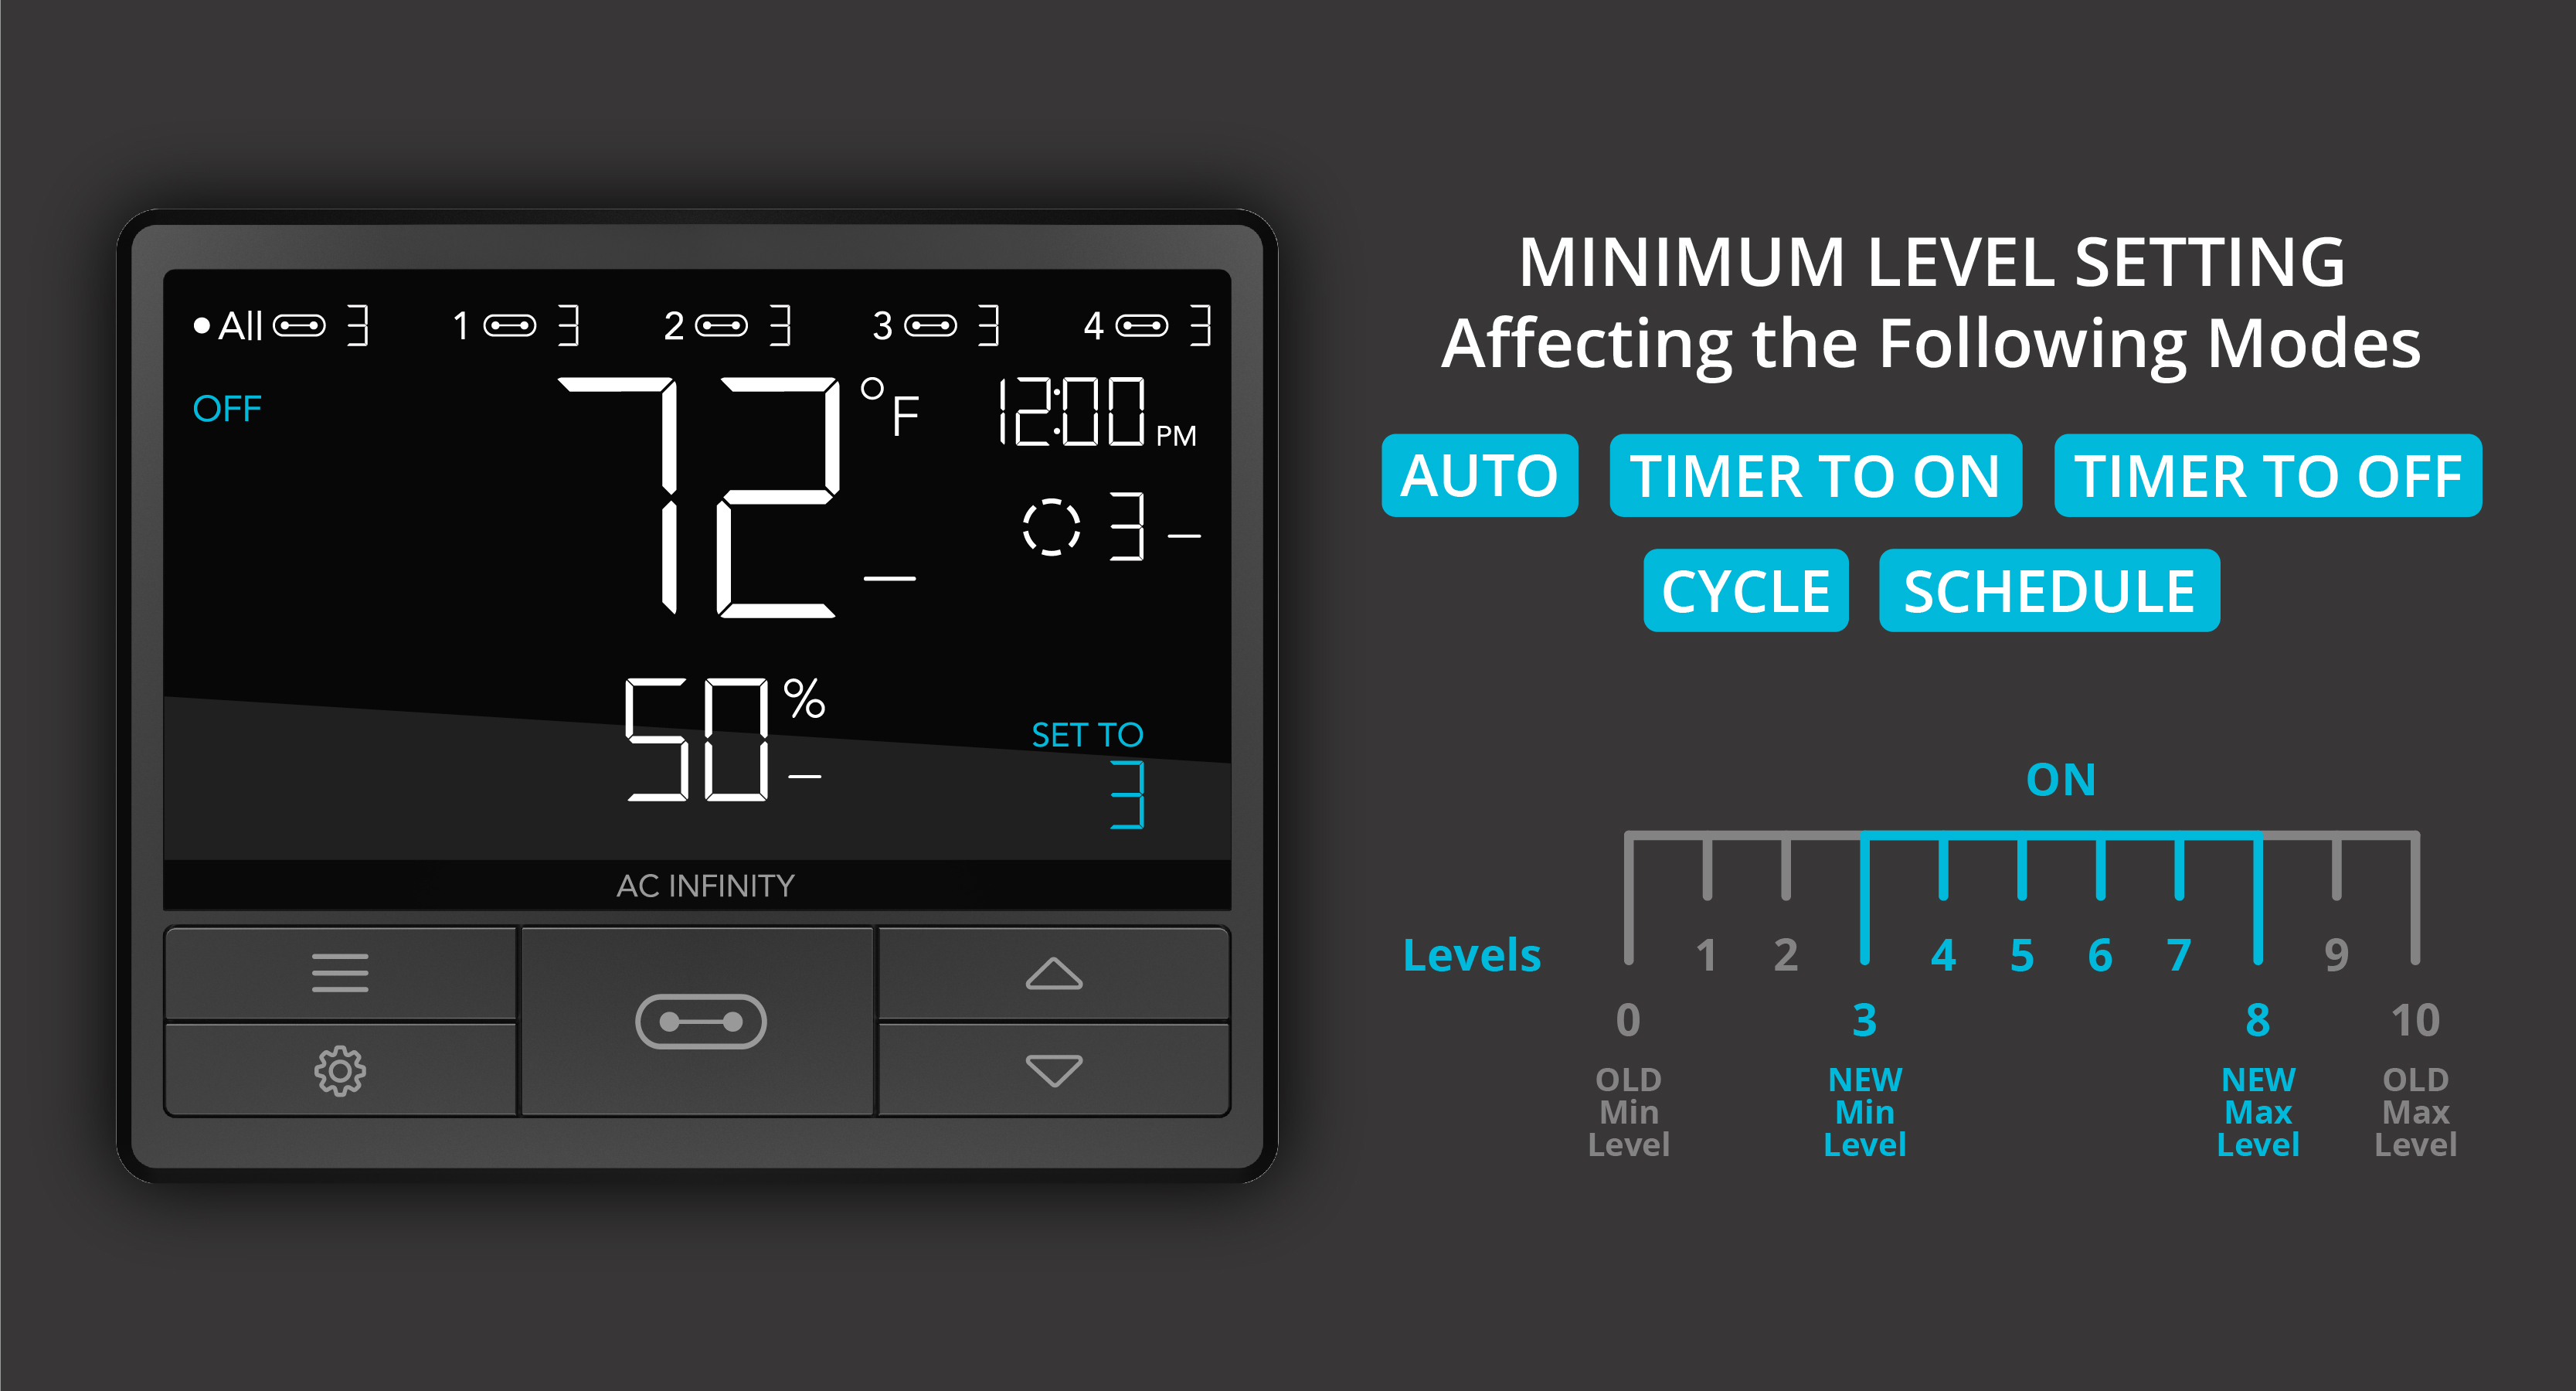
The number you set in OFF mode is the minimum value at which your device continuously runs in all other modes. Devices thus run continuously at this baseline level, even when not actively turned on. Example: you set level 3 in OFF mode and switch to AUTO mode. In this case, your device will run continuously at level 3 until it's triggered by temperature or humidity. If a Transition setting is active, your device's gradual increase will begin from level 3. If you want your device to fully shut off in the OFF state, set the minimum value to 0.
Introduction
This setting extends the programming of AUTO mode so that your device's power level increases gradually the further temperature or humidity strays from your set target value. You can set a transition value for temperature triggers and a separate transition value for humidity triggers. The transition value behaves differently for high and low triggers. On the controller, you reach this setting by pressing the gear button repeatedly until the transition settings for temperature or humidity are displayed. This feature is only available on UIS™ controllers.
Transition for High Temperature Triggers
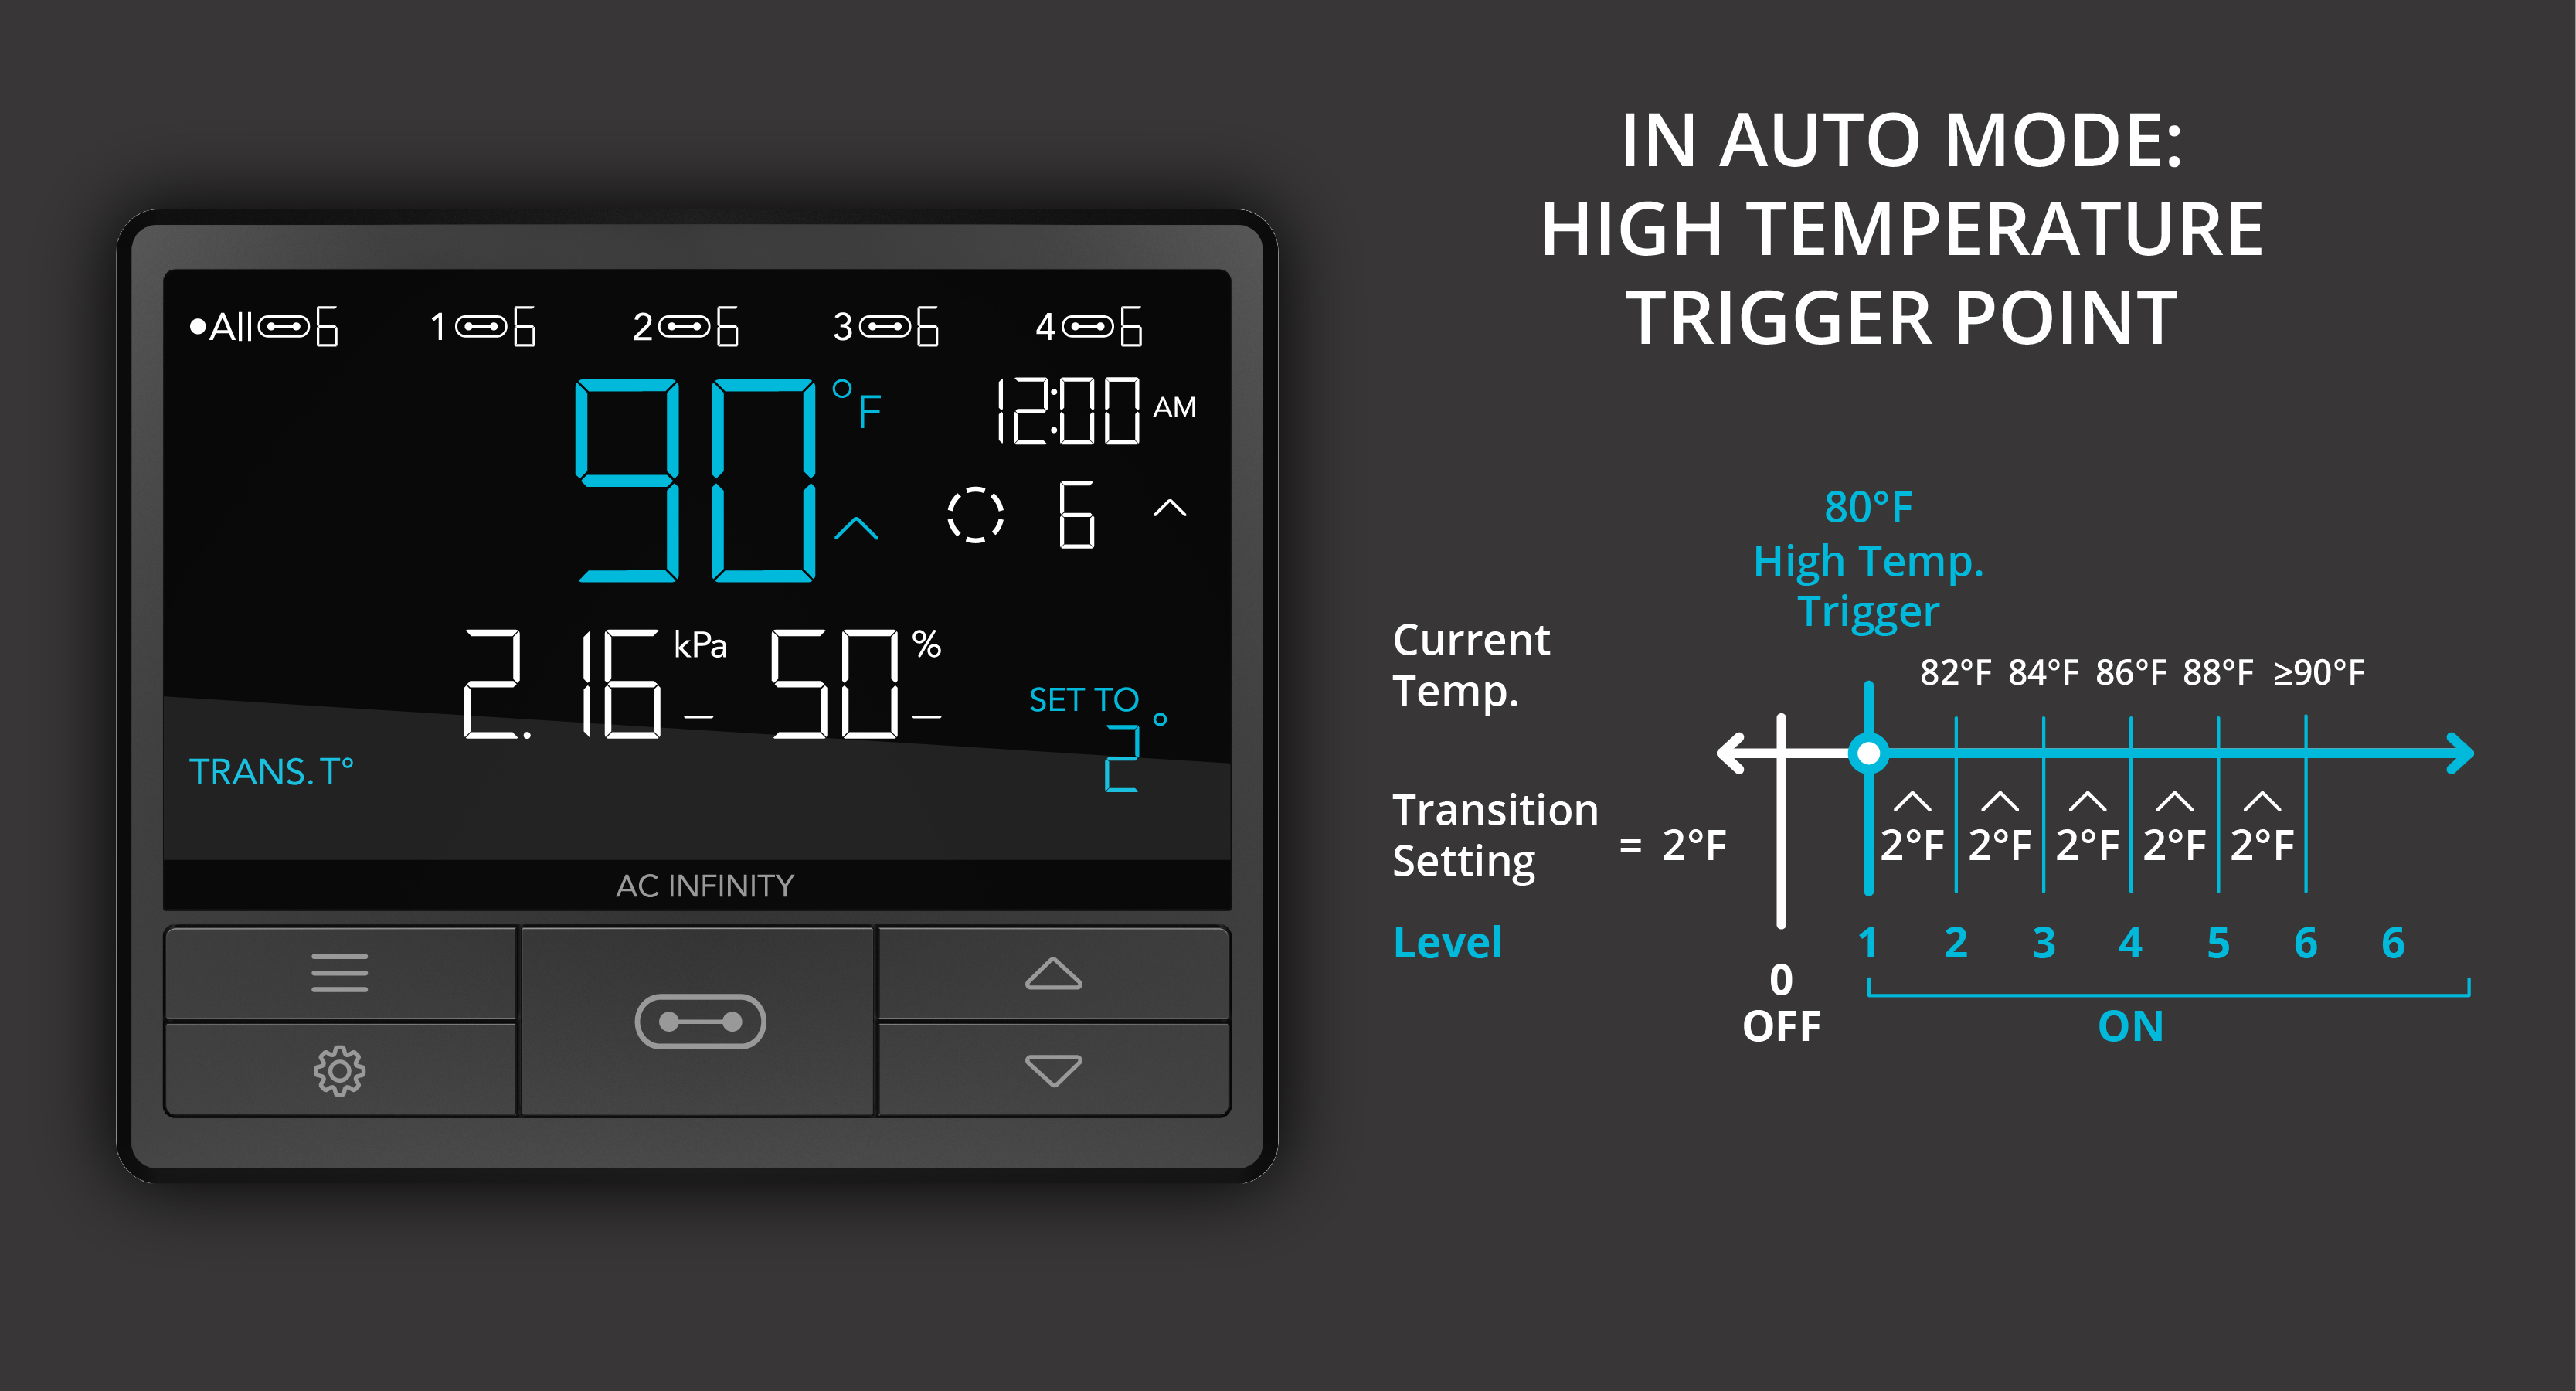
For high temperature triggers, the transition value you set creates even intervals above your set trigger value. For every interval the temperature rises above the trigger value, the device increases its level by one. Example: you set the temperature transition to 1.1°C and use AUTO mode with a high temperature trigger of 26.7°C. The 1.1°C transition value creates intervals of 1.1°C each above the trigger value. Between 26.7°C and 27.2°C, the device runs at level 1. Between 27.8°C and 28.3°C, it runs at level 2. With each additional 1.1°C interval, the device increases its level by one, until the set maximum value is reached.
Transition for Low Temperature Triggers
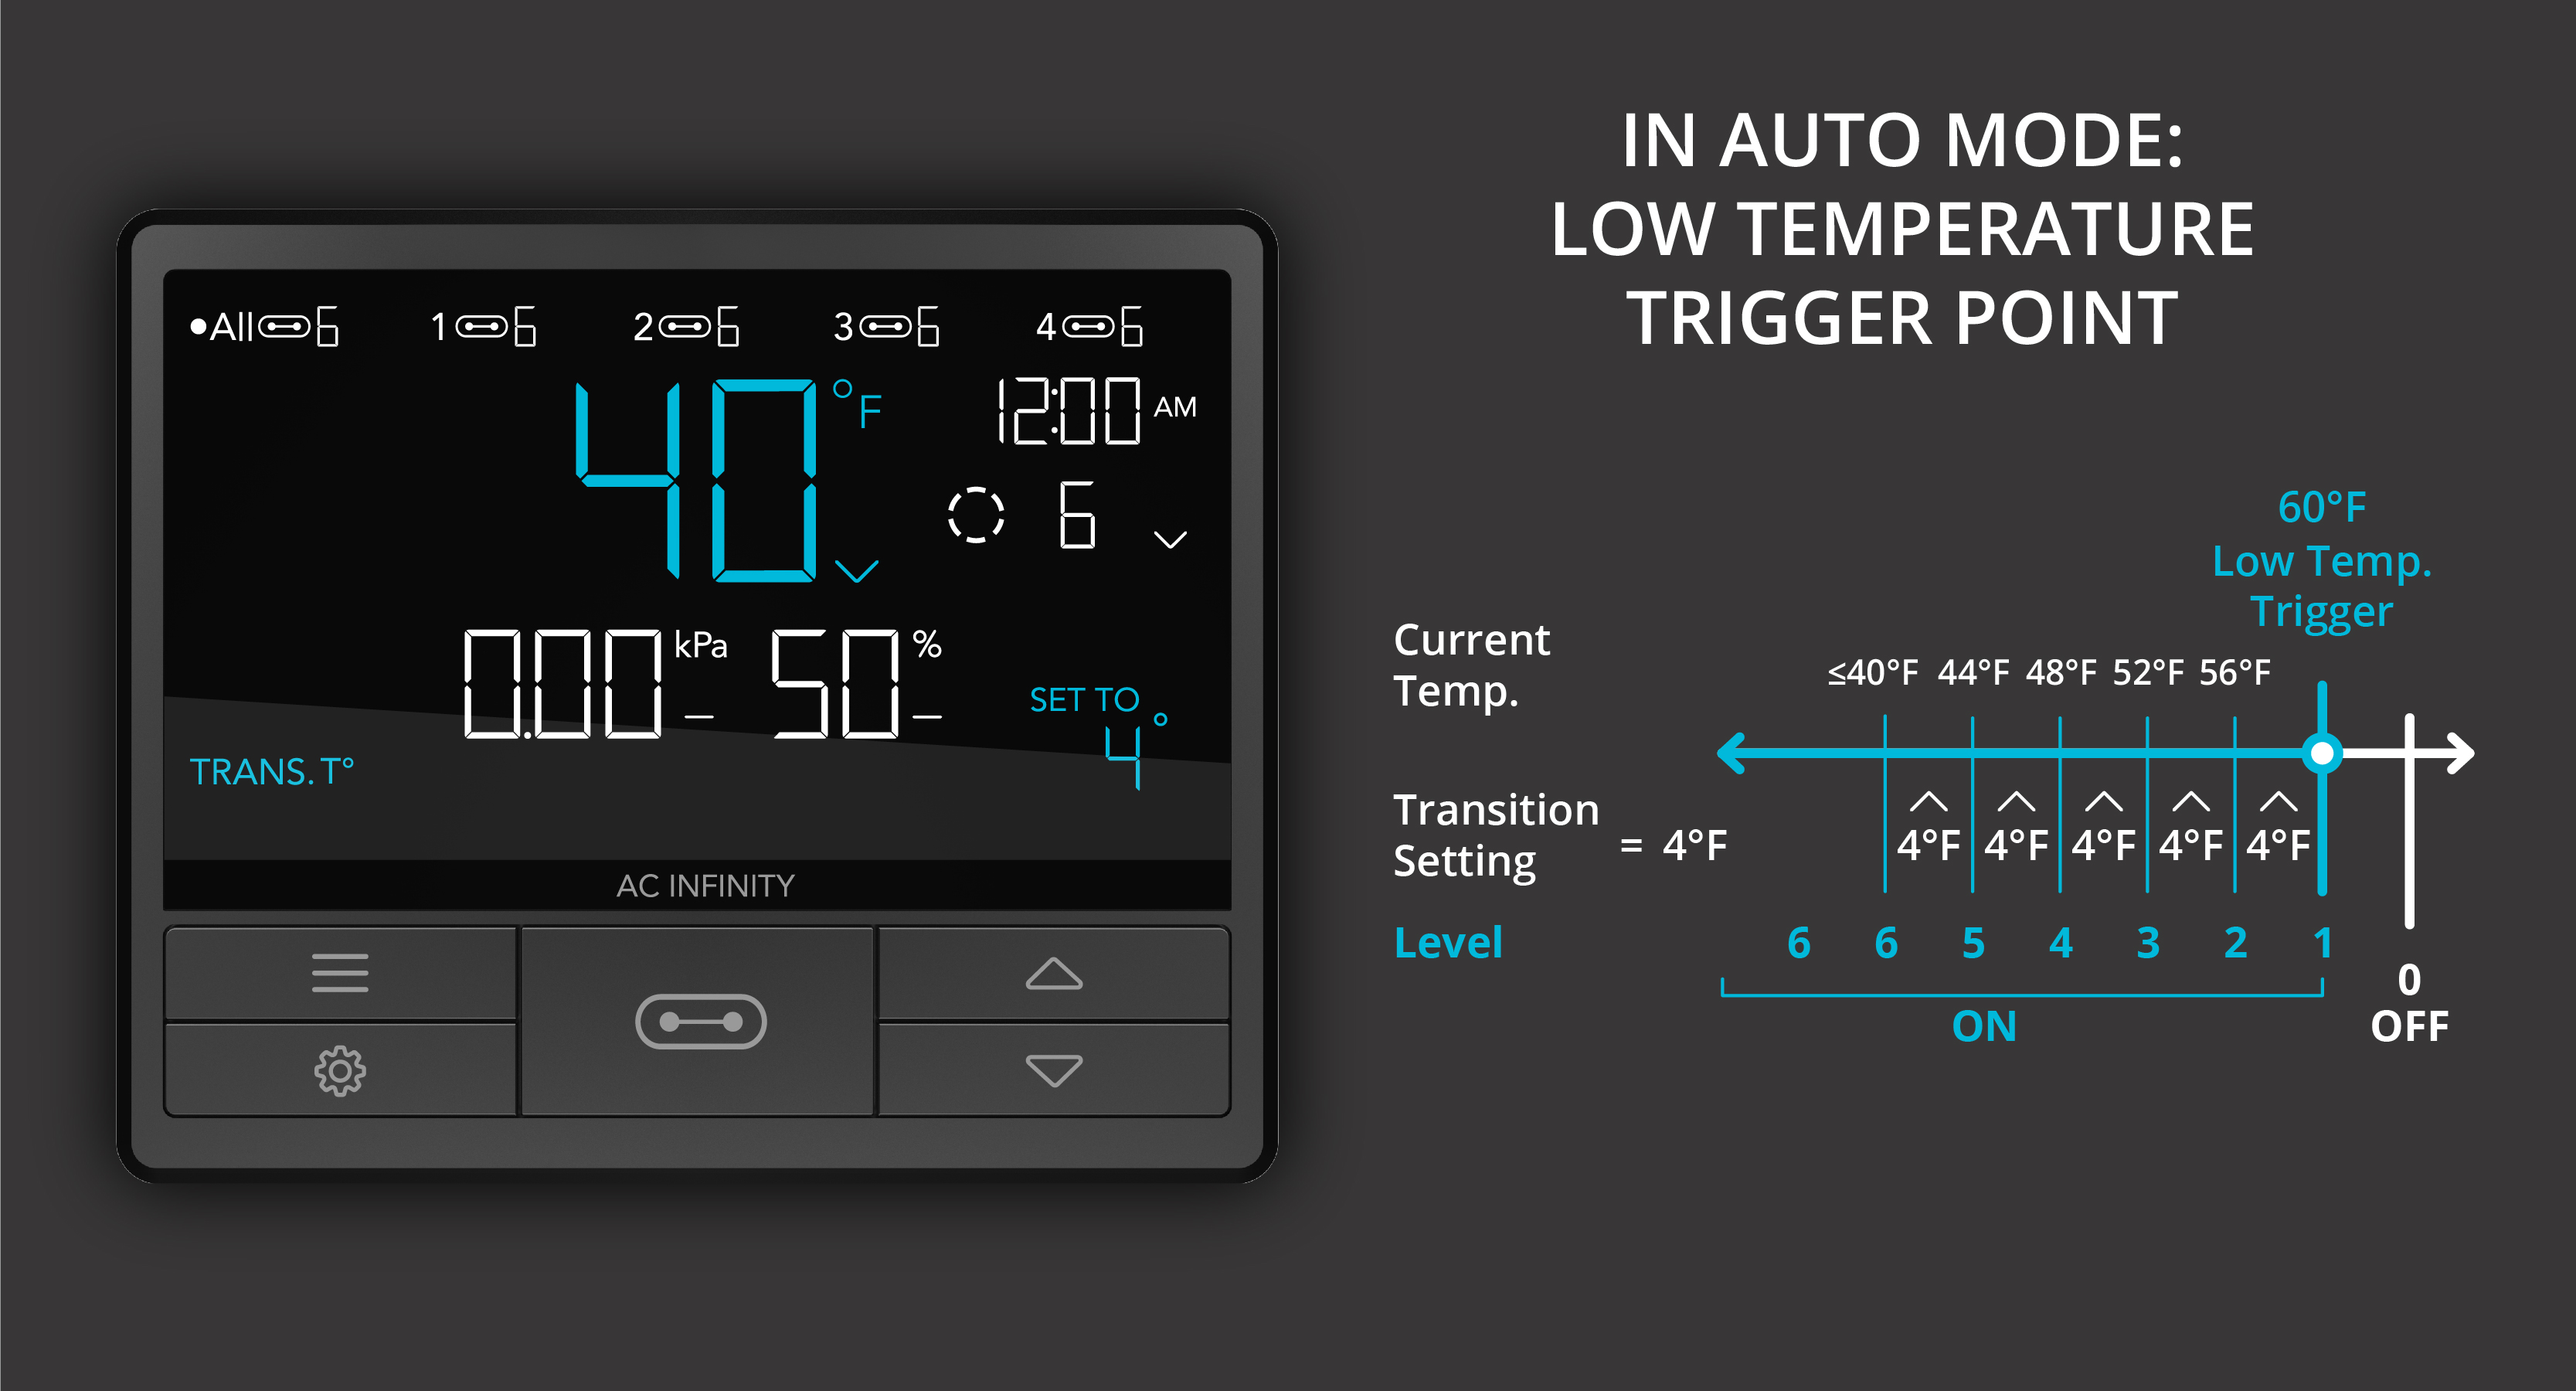
For low temperature triggers, the set transition value creates even intervals below your trigger value. For every interval the temperature falls below the trigger value, the device increases its level by one. Example: you set the temperature transition to 2.2°C and use AUTO mode with a low temperature trigger of 15.6°C. The 2.2°C transition value creates intervals of 2.2°C each below the trigger value. Between 13.9°C and 15.6°C, the device runs at level 1. Between 11.7°C and 13.3°C, it runs at level 2. With each additional 2.2°C interval below the trigger value, the device increases its level by one, until the set maximum value is reached.
Transition for High Humidity Triggers
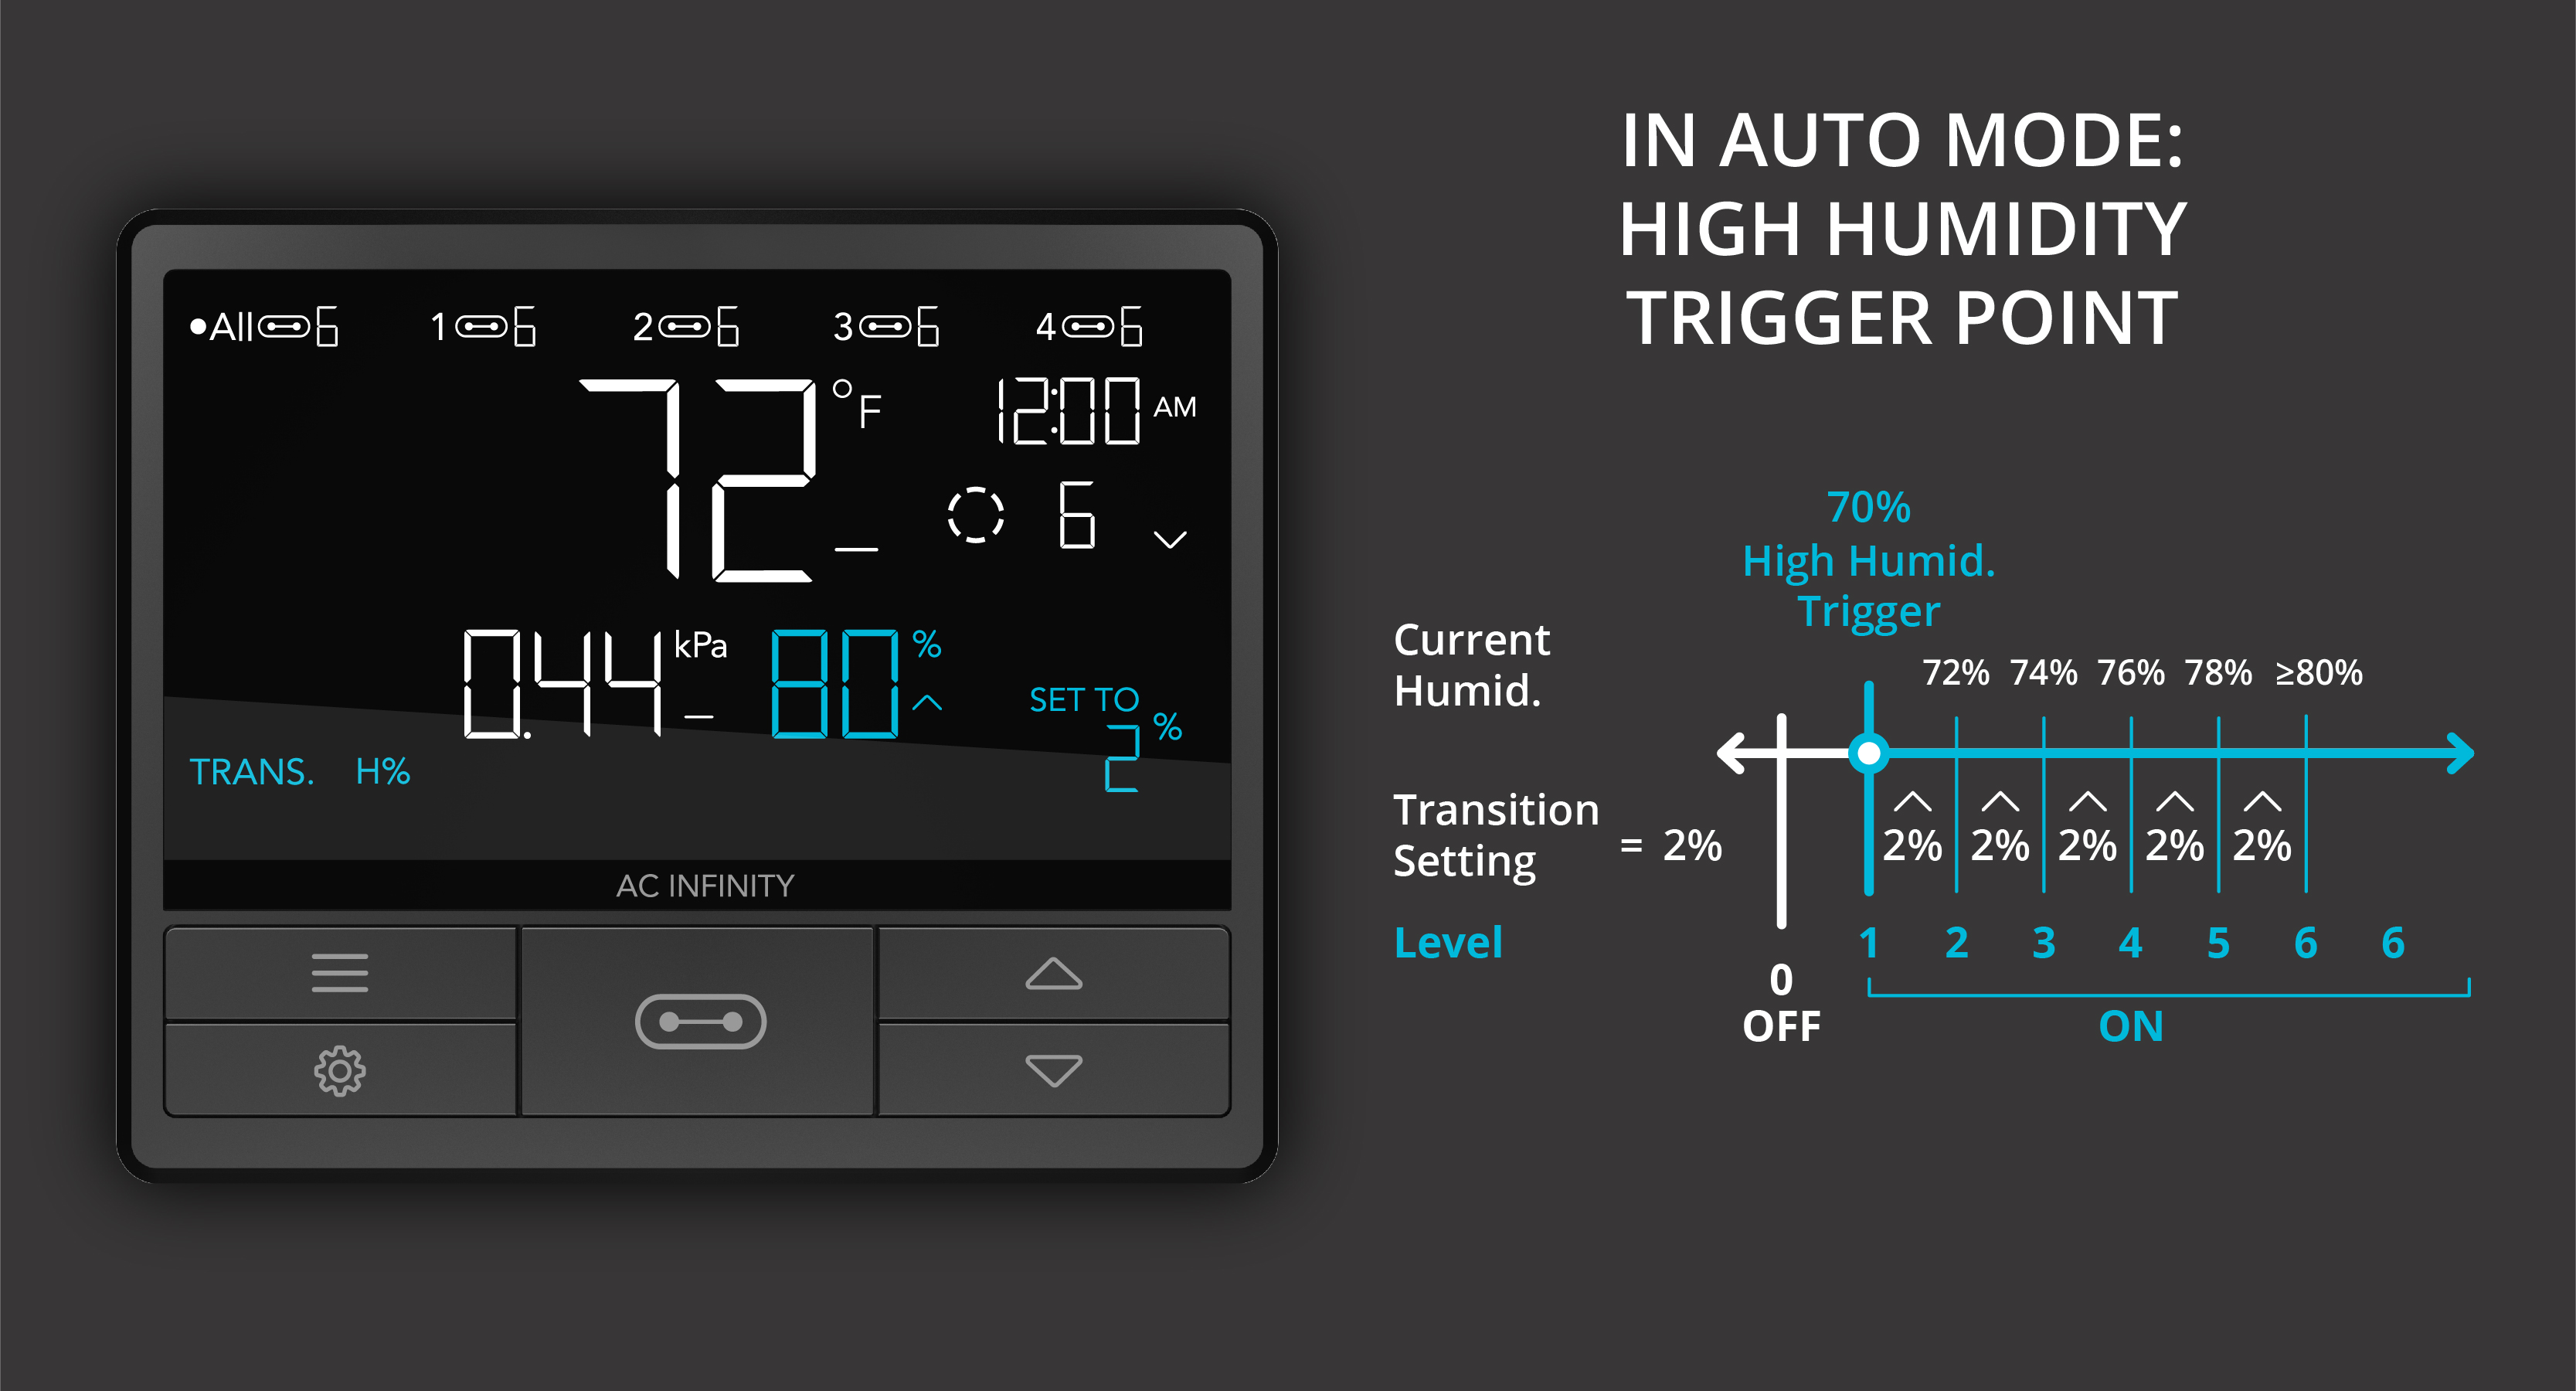
For high humidity triggers, the set transition value creates even intervals above your trigger value. For every interval humidity rises above the trigger value, the device increases its level by one. Example: you set the humidity transition to 2% and use AUTO mode with a high humidity trigger of 70% relative humidity. The 2% transition value creates intervals of 2% each above the trigger value. Between 70% and 71%, the device runs at level 1. Between 72% and 73%, it runs at level 2. With each additional 2% interval, the device increases its level by one, until the set maximum value is reached.
Transition for Low Humidity Triggers
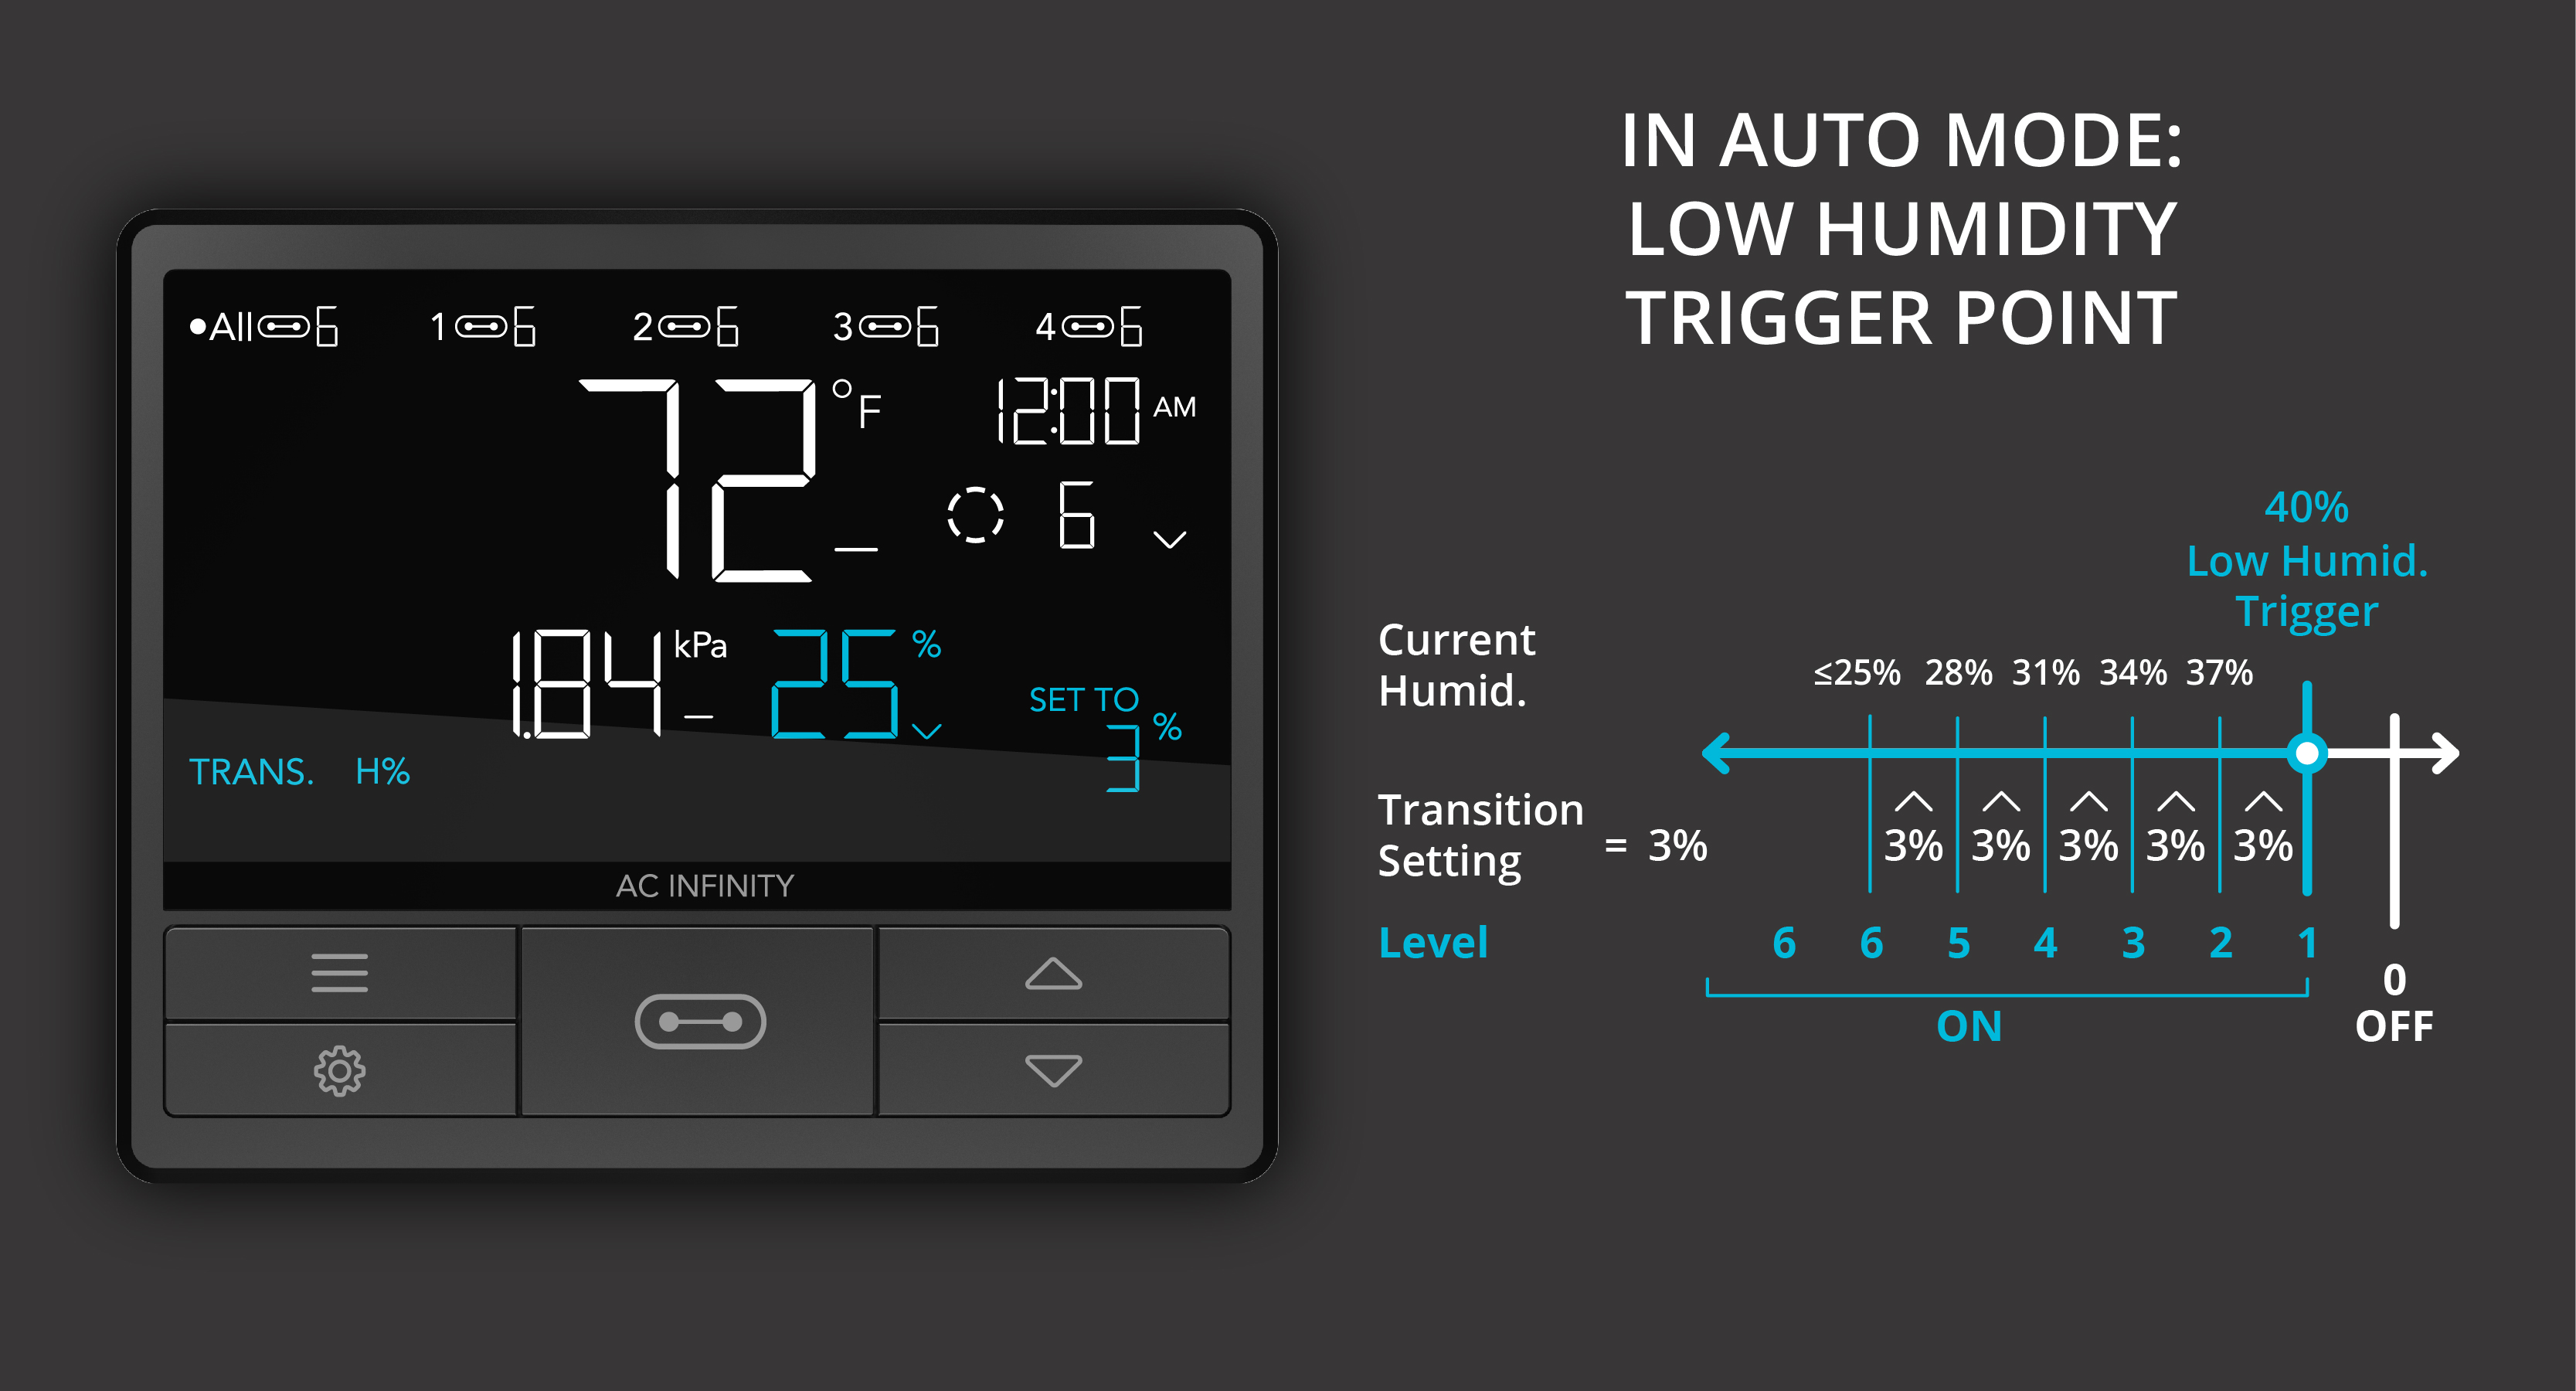
For low humidity triggers, the set transition value creates even intervals below your trigger value. For every interval humidity falls below the trigger value, the device increases its level by one. Example: you set the humidity transition to 3% and use AUTO mode with a low humidity trigger of 40% relative humidity. The 3% transition value creates intervals of 3% each below the trigger value. Between 38% and 40%, the device runs at level 1. Between 35% and 37%, it runs at level 2. With each additional 3% interval below the trigger value, the device increases its level by one, until the set maximum value is reached.
Transition for High VPD Triggers (CONTROLLER 69 PRO only)
For high VPD triggers, the set transition value creates even intervals above your trigger value. For every interval VPD rises above the trigger value, the device increases its level by one. Example: you set the VPD transition to 0.2 kPa and use AUTO mode with a high VPD trigger of 1.0 kPa. The 0.2 kPa transition value creates intervals of 0.2 kPa each above the trigger value. Between 1.0 kPa and 1.1 kPa, the device runs at level 1. Between 1.2 kPa and 1.3 kPa, it runs at level 2. With each additional 0.2 kPa interval, the device increases its level by one, until the set maximum value is reached.

Transition for Low VPD Triggers (CONTROLLER 69 PRO only)
For low VPD triggers, the set transition value creates even intervals below your trigger value. For every interval VPD falls below the trigger value, the device increases its level by one. Example: you set the VPD transition to 0.1 kPa and use AUTO mode with a low VPD trigger of 0.5 kPa. The 0.1 kPa transition value creates intervals of 0.1 kPa each below the trigger value. Between 0.41 kPa and 0.5 kPa, the device runs at level 1. Between 0.31 kPa and 0.4 kPa, it runs at level 2. With each additional 0.1 kPa interval below the trigger value, the device increases its level by one, until the set maximum value is reached.

Settings That Affect Your Programming
Max and Min Value Settings – All programming modes can be limited by these settings. When the device is meant to turn off, it keeps running at the minimum level you've set. When the device turns on, it runs up to the maximum level you've set. The max or min value corresponds to the levels you've set in ON and OFF mode, respectively. Combined with the Transition setting, this means your device starts at the minimum level and then gradually increases up to the maximum level.


