


Introduction
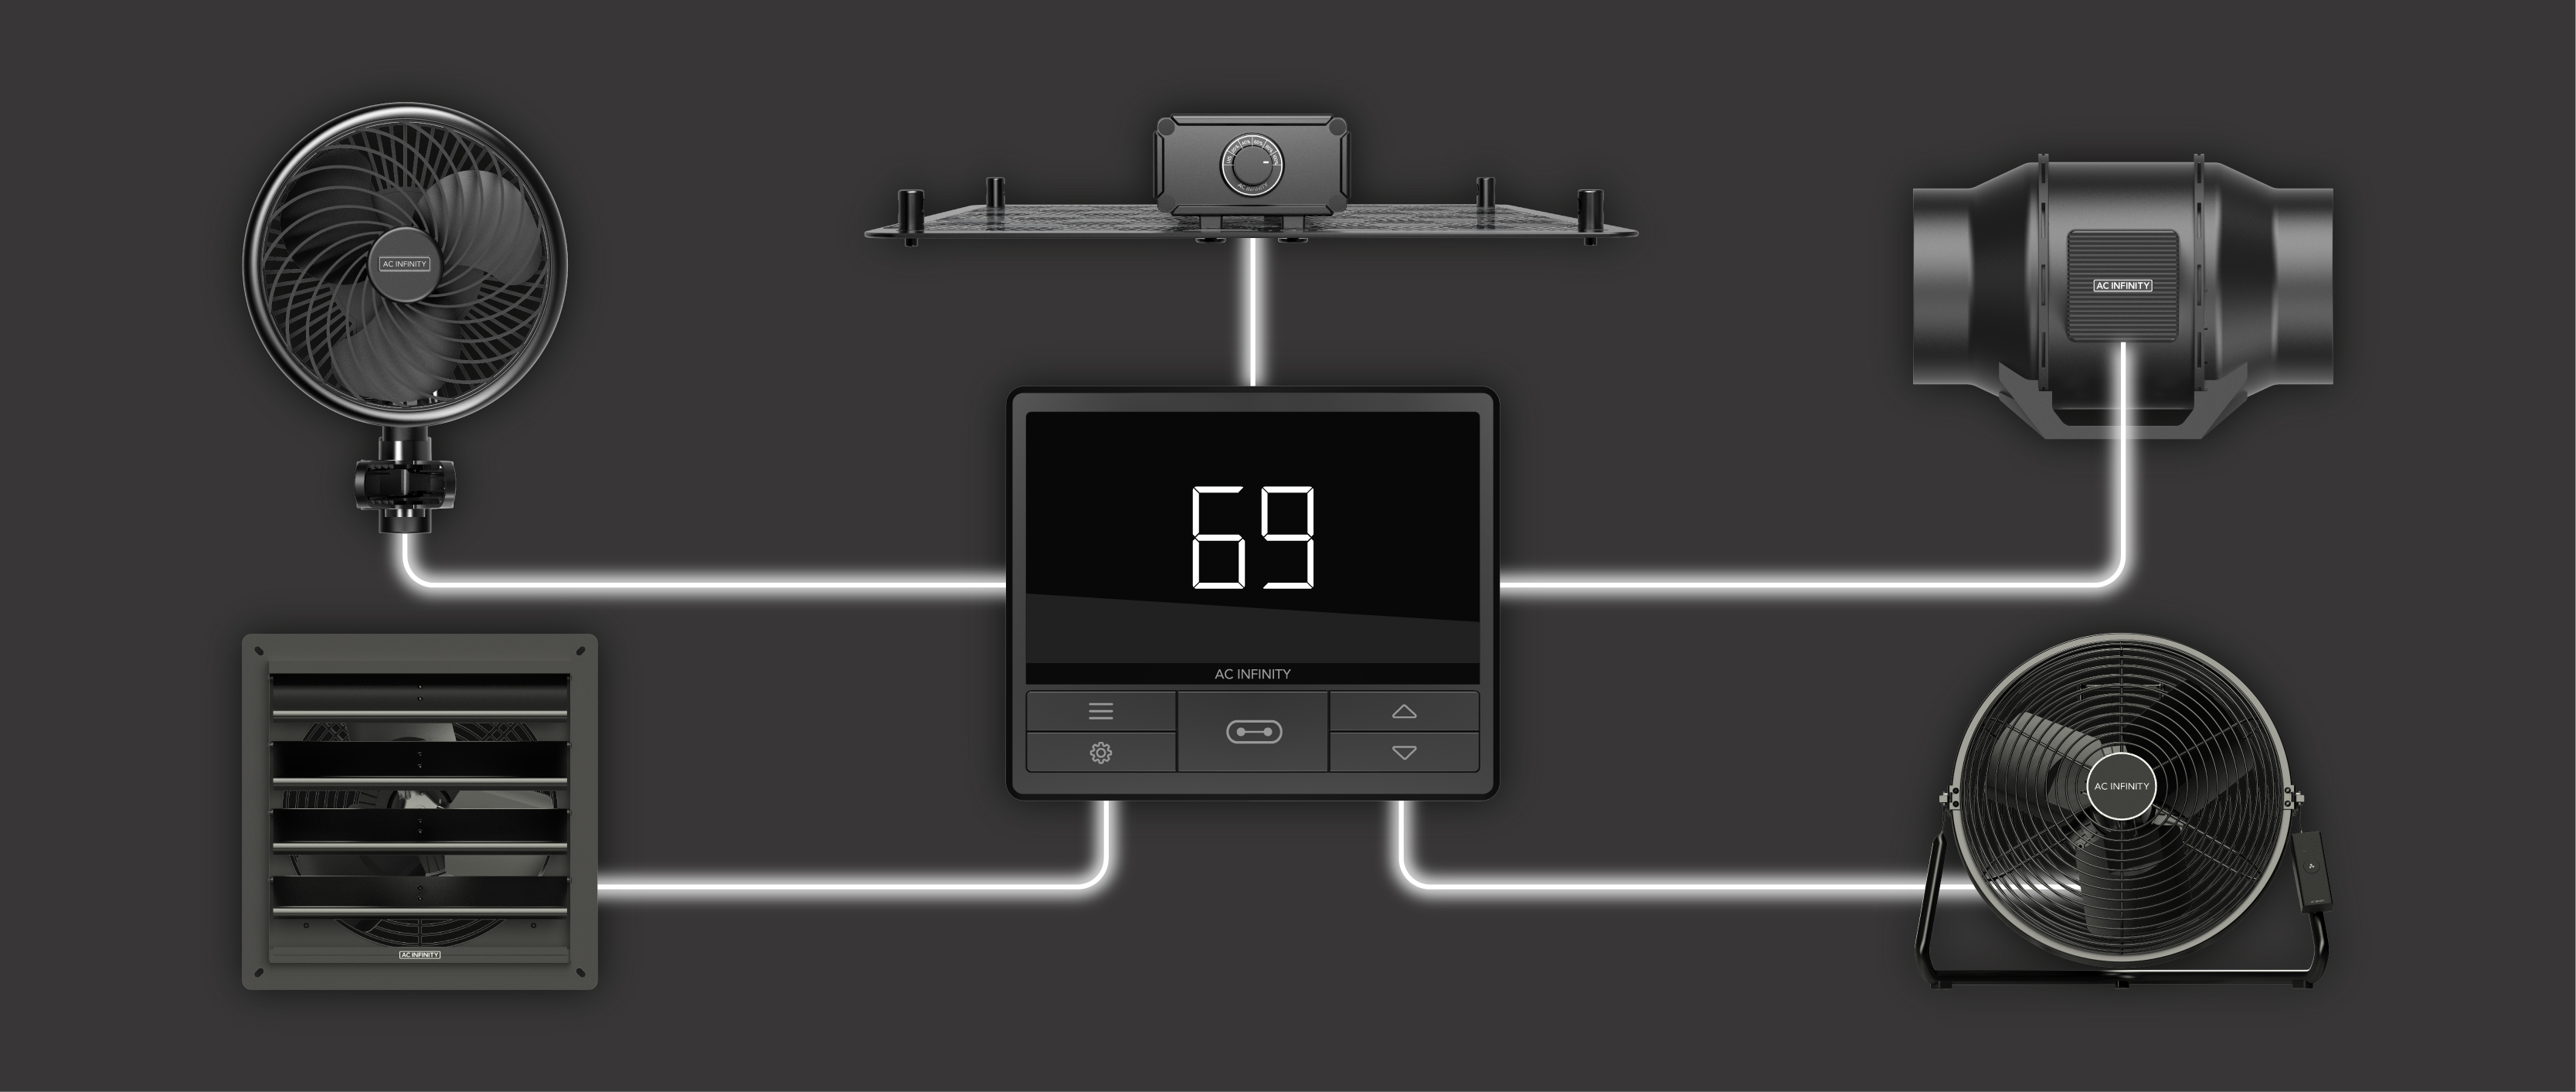
Welcome to the AC Infinity UIS™ platform — the most advanced and versatile climate and environment control platform in the world! Choose from a constantly growing selection of devices that work together to create your ideal environment. Connect up to four devices to our Smart Controller and program each one individually, tailored to your application. Our innovative system can precisely control each device's output from 0 to 10 — such as fan speed or light intensity — to achieve exactly the climate you want.
MODELS –
CONTROLLER 69 (CTR69A),
CONTROLLER 69 WIFI (CTR69X),
CONTROLLER 69 PRO (CTR69P),
CONTROLLER 69 PRO+ (CTR69Q, 8-port)
DEVICE CONTROL – All UIS™ devices, see the compatibility list
NUMBER OF DEVICES – 4 devices, independent programming
PLUG TYPE – UIS
CONTROL – PWM, 10 levels
PROGRAMS – Temperature and humidity triggers, VPD triggers (PRO & PRO+ only), timer, cycles, schedules, advanced programs via app
SETTINGS – Max/min level, dynamic transitions, lock/hide display, °F/°C, calibration, and more
CLIMATE SENSORS – Temperature and humidity
APP CONNECTION – Bluetooth or WiFi (2.4 GHz)
Quick Start
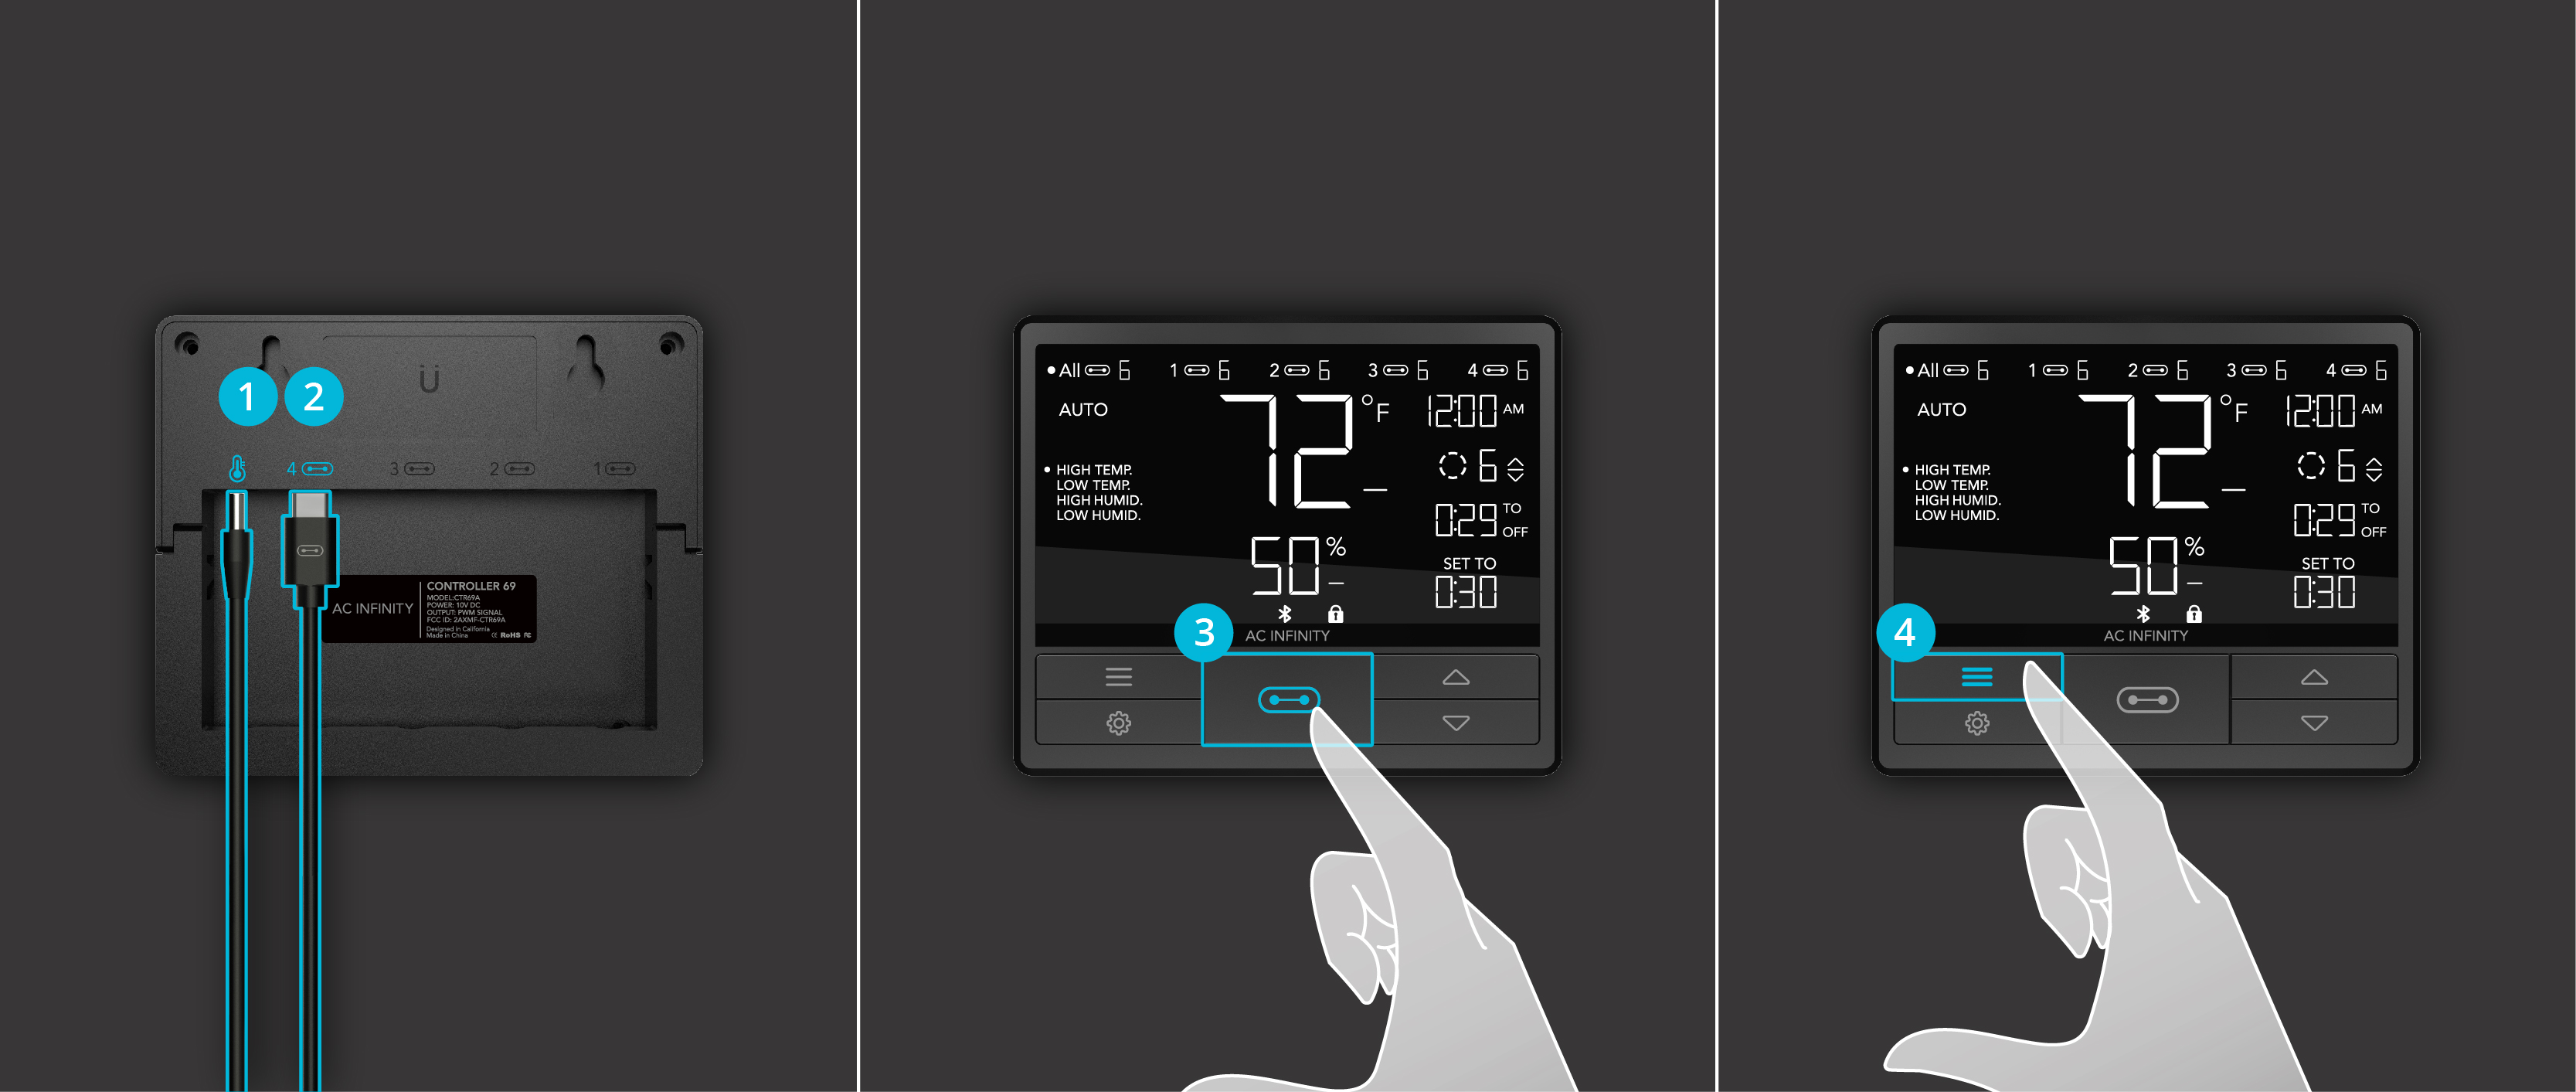
1. Plug the temperature/humidity sensor into the designated port on the back of the controller.
2. Connect your first UIS device to one of the four ports on the back — this will also power the controller.
3. Press the "Port" button until you select the port your device is connected to (see diagram below).
4. Press the "Mode" button until you select the desired program for your device (see mode info below).
5. Use the "Up/Down" buttons to adjust the mode's parameters. The program starts automatically.
6. If needed, check settings that may affect your program. Then return to the desired mode.
7. Connect additional UIS devices as needed and repeat steps 3 through 6.
Controller Diagram
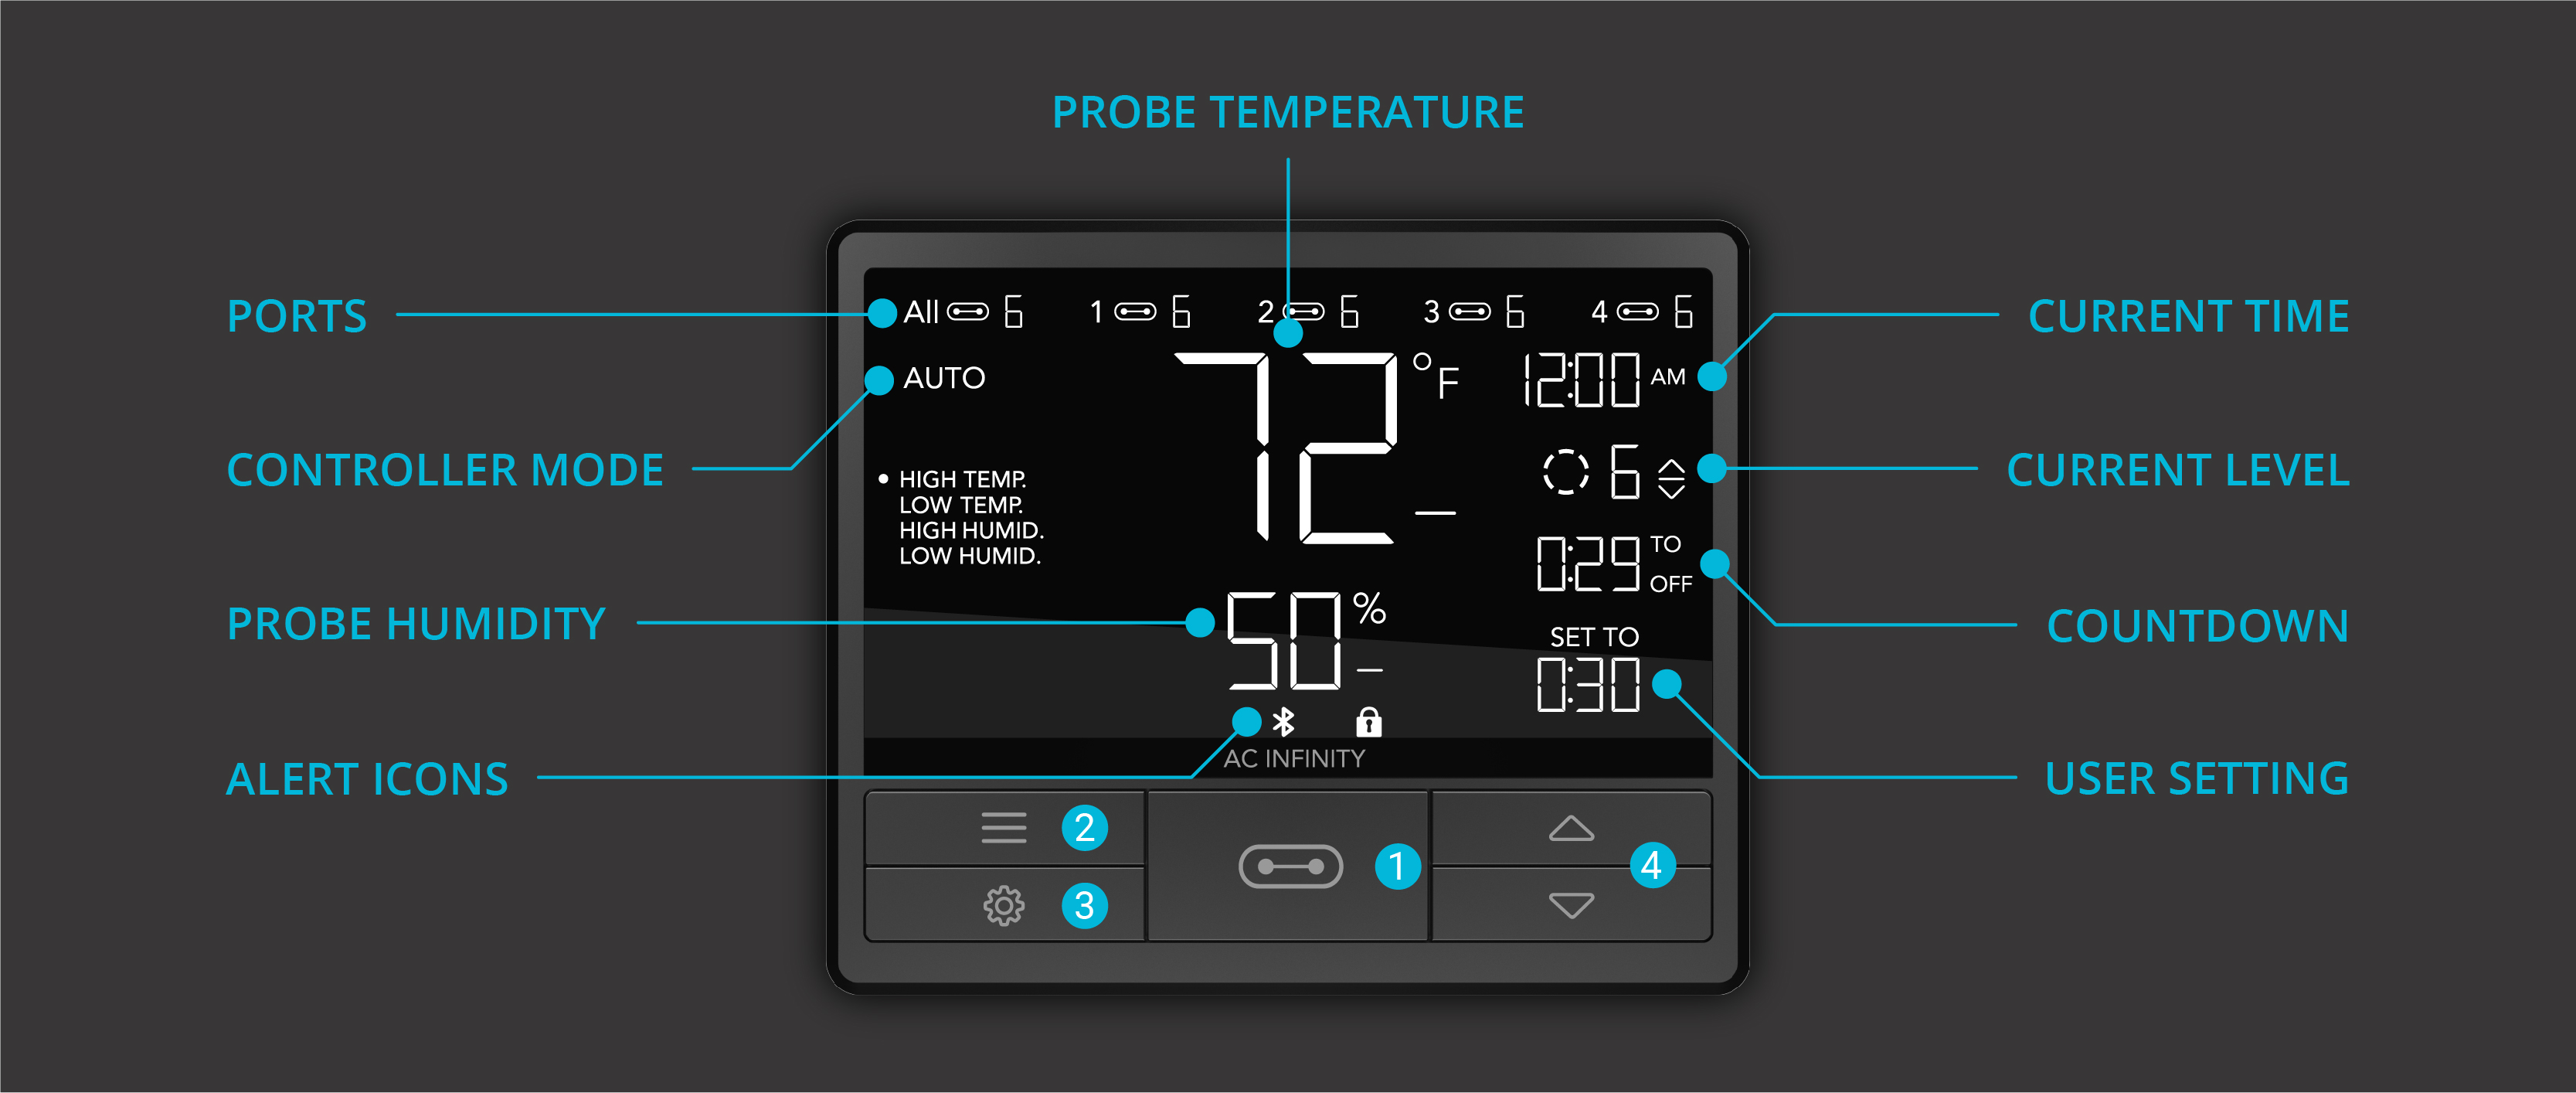
1. Port Button – Cycles through all connected devices.
2. Mode Button – Cycles through all of the controller's modes for that port.
3. Setting Button – Cycles through all of the controller's settings.
4. Up/Down Buttons – Adjust the parameters of the selected mode or setting.
Programming Modes
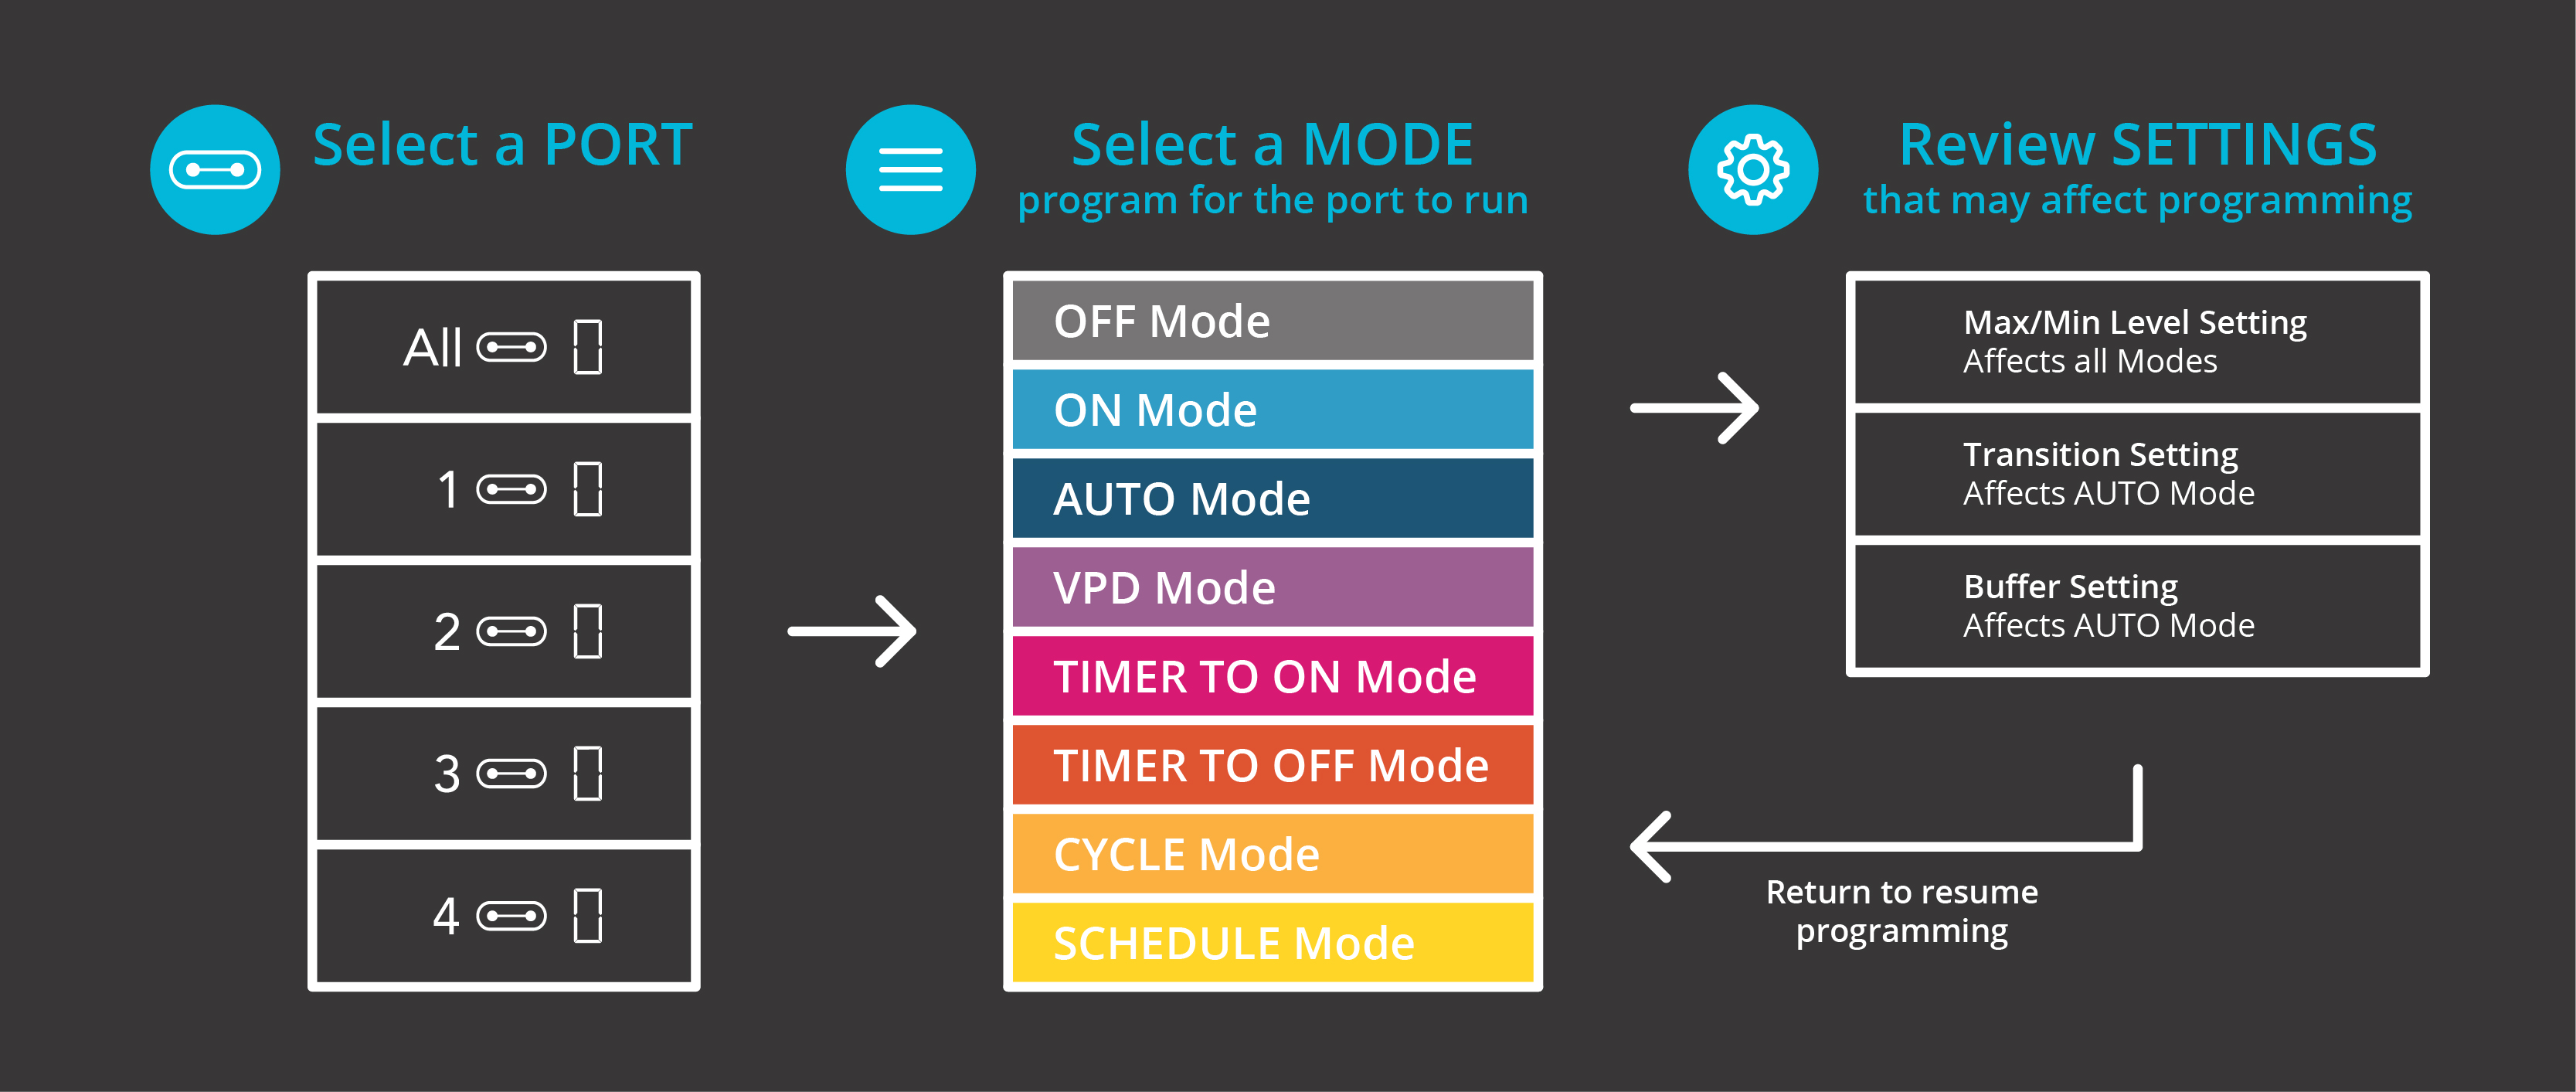
• OFF Mode – Turn the device off.
• ON Mode – Keep the device running continuously at a level of 0–10.
• AUTO Mode – Set temperature and humidity triggers.
• VPD Mode (PRO & PRO+ only) – Set VPD triggers.
• TIMER TO ON Mode – A countdown that turns the device on once it ends.
• TIMER TO OFF Mode – A countdown that turns the device off once it ends.
• CYCLE Mode – Repeating on/off cycles.
• SCHEDULE Mode – Set daily on/off times.
Controller Settings
• Max/Min Level – Sets the minimum and maximum level of a device.
• Transition Setting – The device ramps up/down gradually in response to climate deviations (AUTO mode only).
• Buffer Setting (PRO & PRO+ only) – Prevents the device from switching on/off too quickly due to fluctuations around the trigger point.
• Other Settings – Units (°F/°C), display brightness, calibration, and more.
Warning Icons
CONTROLLER 69

1. Advanced Program – Shown when an app program is active.
2. Auto Mode Alarm – Flashes when triggers in AUTO mode activate.
3. Timer Alarm – Flashes when a countdown (TIMER, CYCLE, SCHEDULE) ends.
4. Bluetooth/WiFi – Shows the connection with the app.
5. Display Lock – Shows if the controller is locked.
6. Temperature/Humidity Alarm – Flashes and beeps when the set trigger is reached.
CONTROLLER 69 PRO

1. VPD Alarm – Flashes when VPD triggers activate.
2. Trigger Alarm – Flashes when temp./humidity/VPD triggers from the app activate.
3. Advanced Program – Shown when an app program is active.
4. Timer Alarm – Flashes when a countdown (TIMER, CYCLE, SCHEDULE) ends.
5. Display Lock – Shows if the controller is locked.
6. Bluetooth/WiFi – Shows the connection with the app.
7. Temperature/Humidity Alarm – Flashes and beeps when the set trigger is reached.
App Control, Alerts, and Advanced Programs
Connect your controller to the AC Infinity app to unlock advanced programs, data charts, alerts, and more. Follow the step-by-step guides on the Connecting to the App page and check out the App Overview to learn more about how to use it.


