





Controls Tab
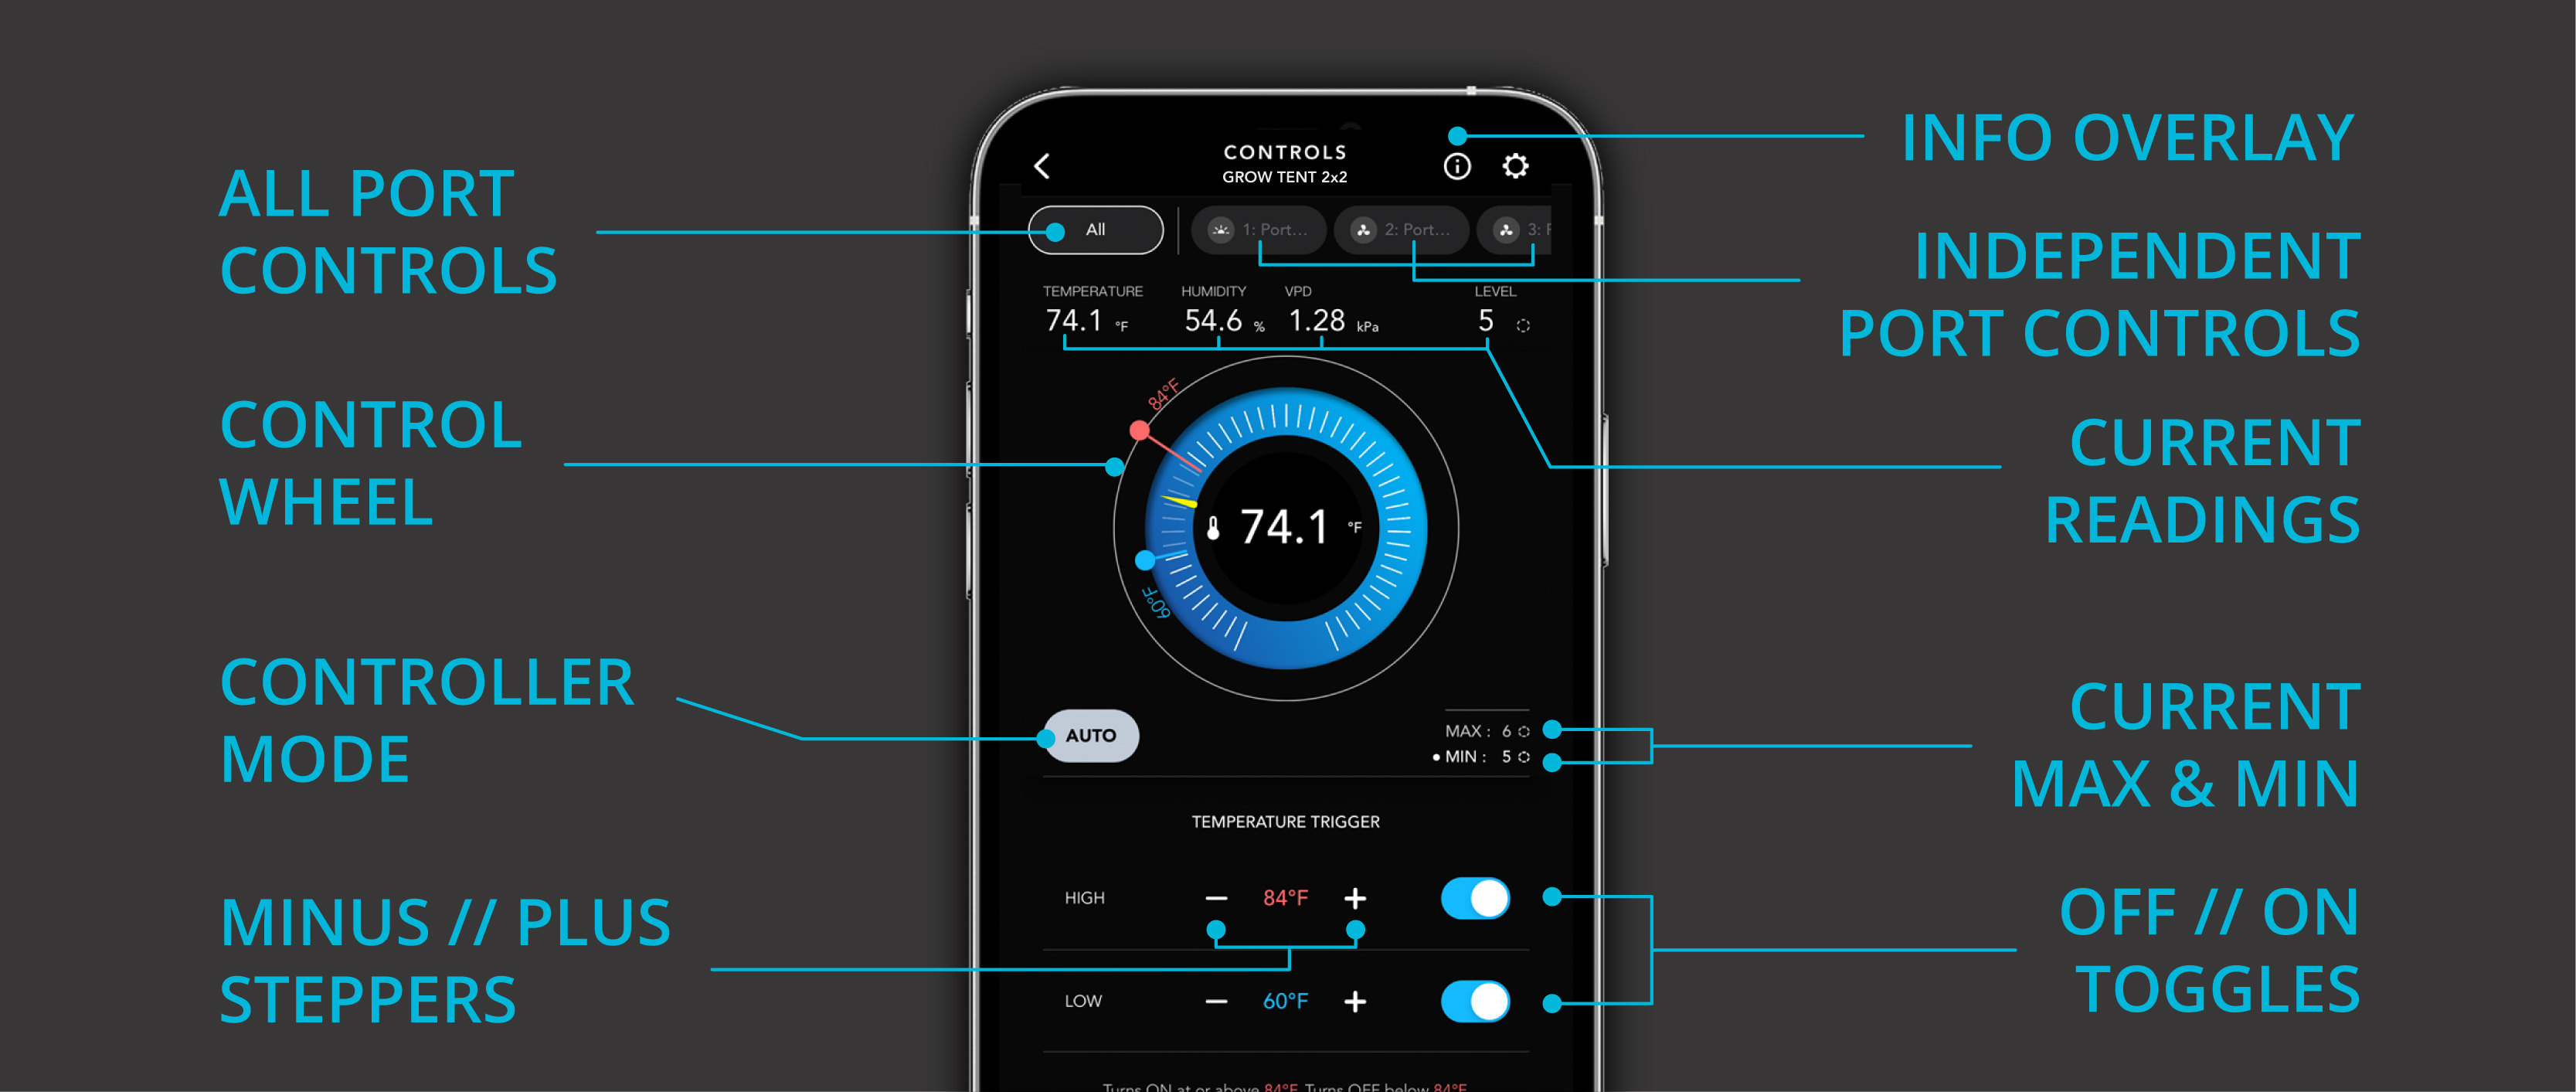
The wheel provides a visual representation of the controller's functions. Using the pointers, you can easily adjust fan speed and triggers. You can also change the settings via the slider below the wheel, or use the "+/-" buttons for finer adjustment. The center of the wheel shows the current fan speed, the time, and the climate conditions of the area where the probe is placed. The orange pointer along the wheel shows the current temperature or humidity along with the value in the center.
Programming Modes

You can switch between climate readouts and triggers by selecting the following modes:
OFF Mode – Turn the device off.
ON Mode – Keep the device running continuously at a level of 0 to 10.
AUTO Mode – Set temperature and humidity triggers that turn the device on or off.
TIMER TO ON Mode – A one-time countdown, after which the device turns on.
TIMER TO OFF Mode – A one-time countdown, after which the device turns off.
CYCLE Mode – Set an on/off interval that the device repeats continuously.
SCHEDULE Mode – Set a daily on/off time schedule that repeats.
Settings That Affect Your Programming
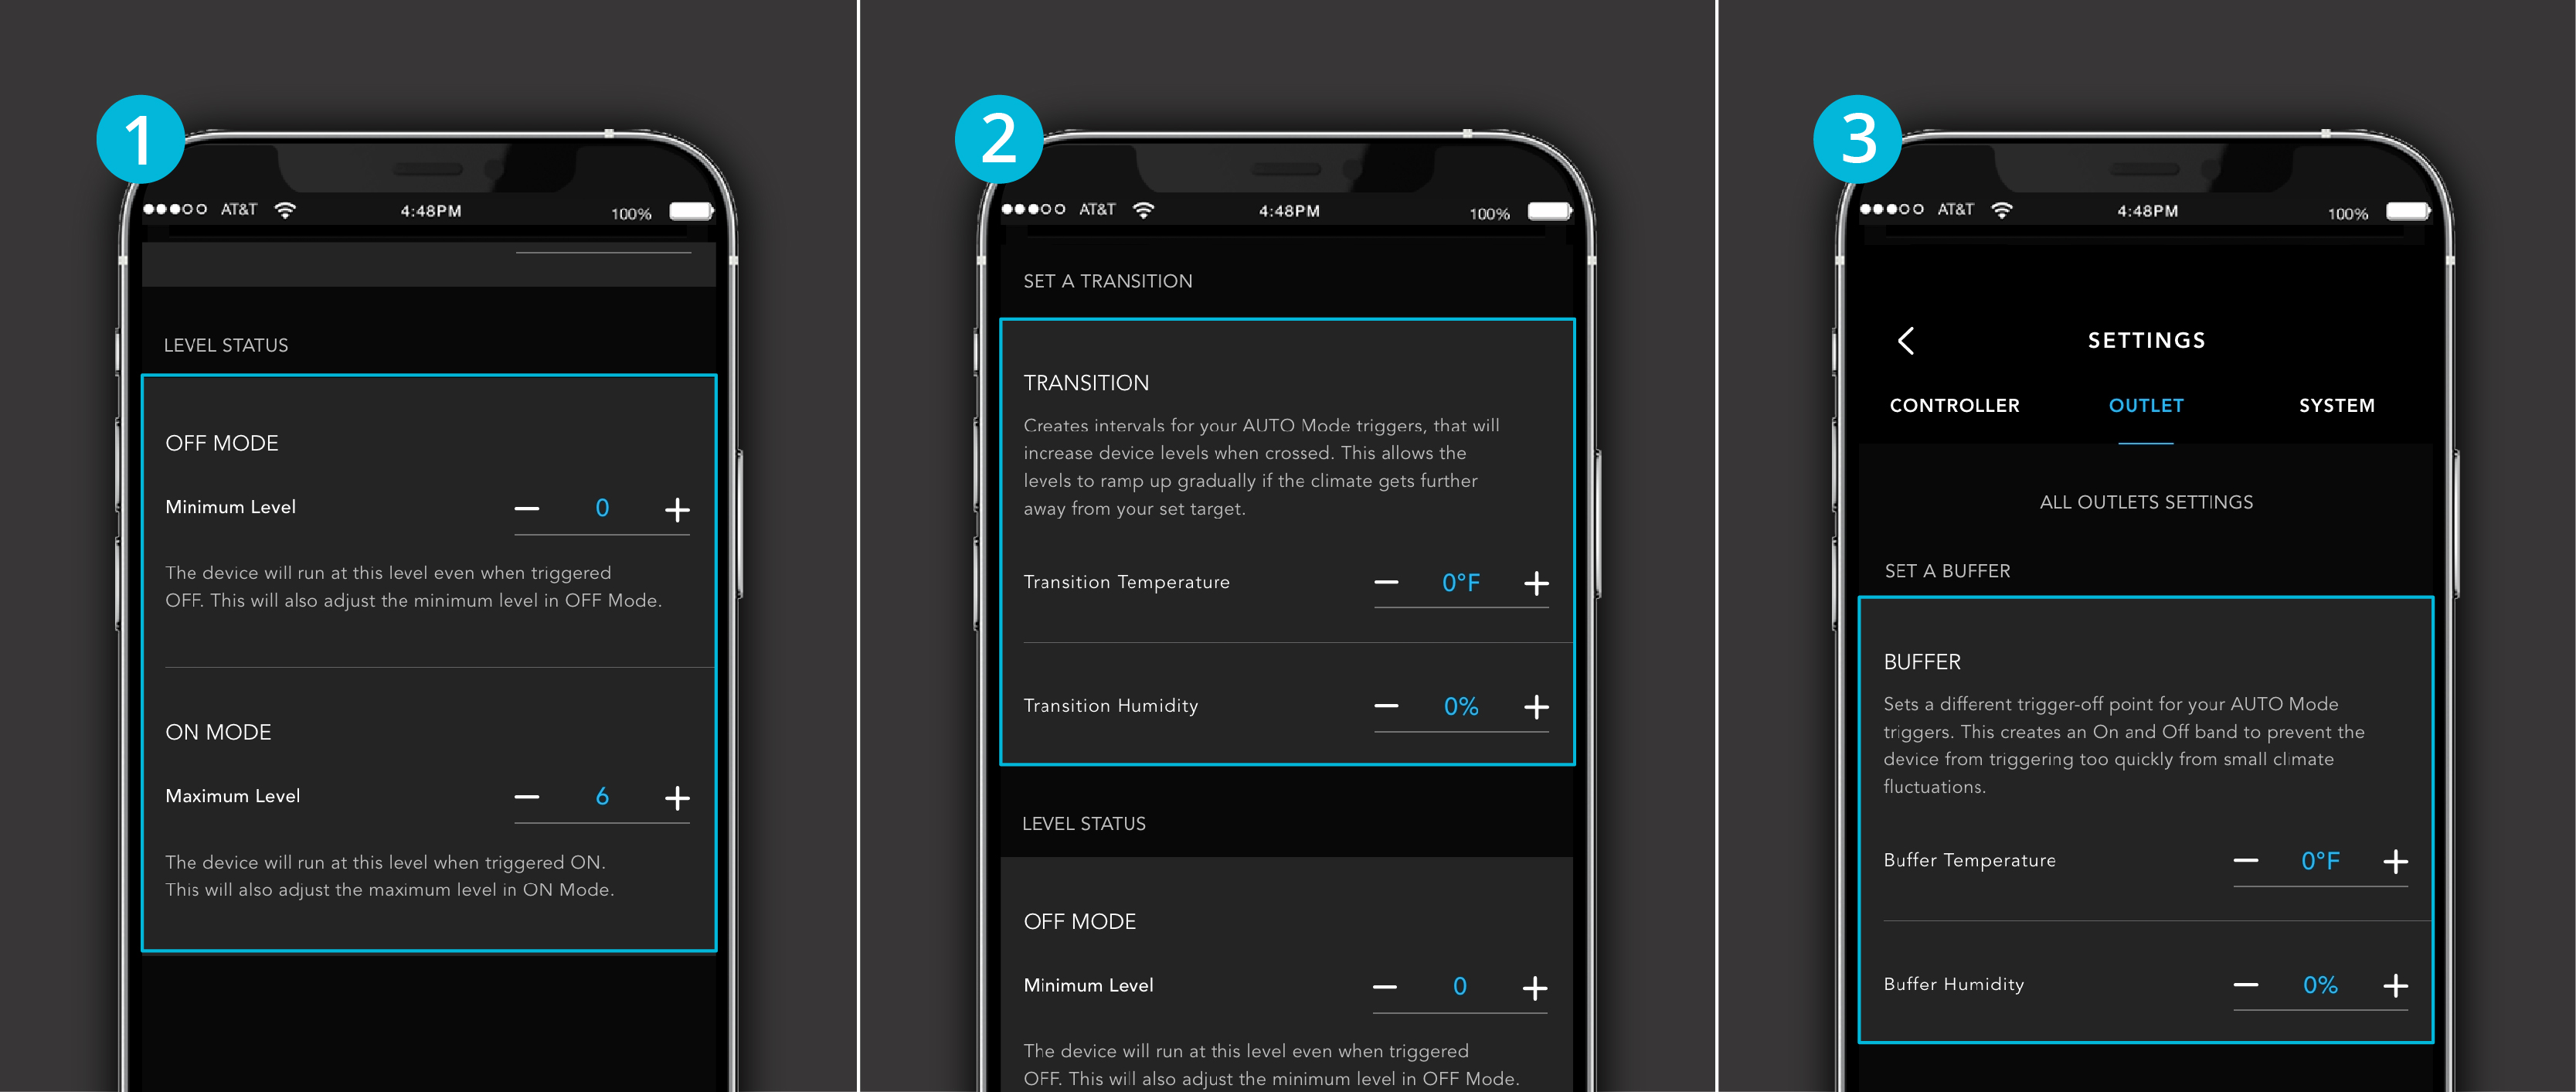
1. Max and Min Level Settings – all programming modes can be limited by these settings. When the device is triggered to "Off," it runs at the minimum level you've set. When triggered to "On," it runs up to the maximum level you've set. The Max and Min setting is the level you've set in ON or OFF mode, respectively.
2. Transition Setting – programs the device to dynamically adjust its levels based on the difference between the temperature or humidity and your target value.
3. Buffer Setting – applies to outlet devices that can only be turned on or off, adding a margin to your temperature and humidity triggers to prevent your device from switching off again too quickly.


